


Are you wondering whether a drill mixer can make mixing your DIY projects easier? Look no further. Here we’ll dive into how these handy tools streamline mixing tasks for materials like concrete and paint, what to consider when picking out a drill mixer, and simple steps to operate one. It’s about making your DIY mixing quick, even, and less labor-intensive.
Key Takeaways
- Choosing the right drill mixer entails considering the viscosity and volume of the material, compatibility with mixing paddles, and assessing the need for renting versus purchasing based on frequency of use.
- Mixing paddles come in various designs suited for different materials, with specific structures such as helical, twin-blade, or three-blade spiral paddles enhancing the efficiency and quality of the mix.
- Proper mixing techniques, including safety measures, starting slow, and a consistent movement, are crucial for achieving a high-quality mix. Regular mixer maintenance helps prevent common issues like overheating and extends the tool’s lifespan.
Choosing the Right Mixer for Your Project
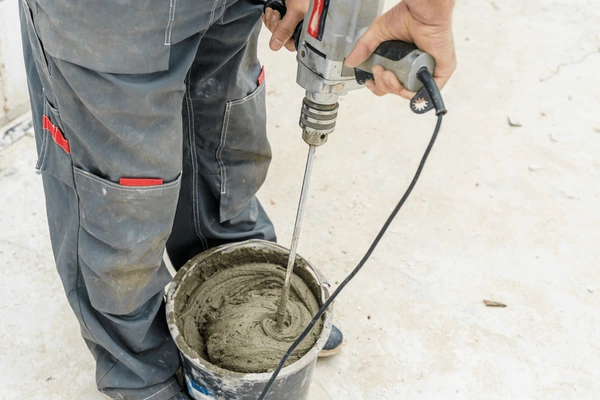

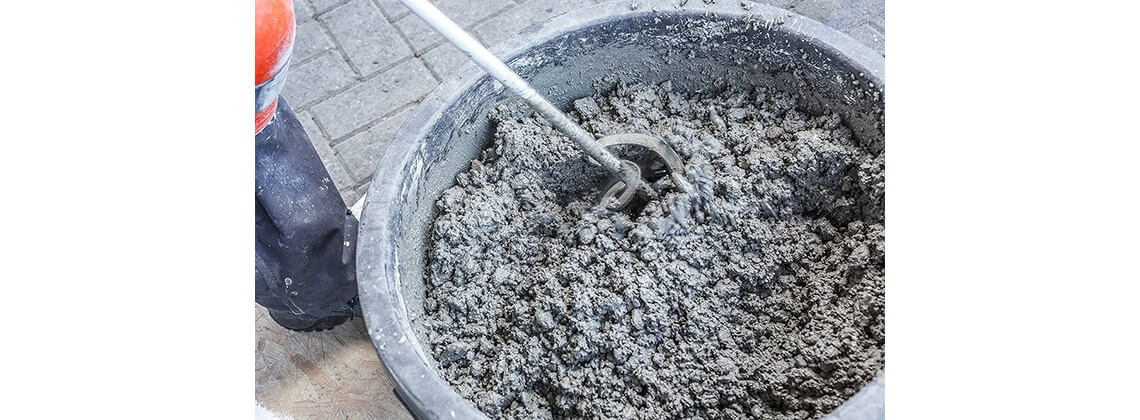
Selecting the right drill mixer for your DIY project depends largely on the material you’re dealing with. When selecting a drill mixer, the viscosity and volume of the material you’re working with should be taken into account since heavier materials like concrete require more power. Hence, it’s important to match the drill mixer’s power and strength capabilities with the requirements of your project.
What about mixing paddle compatibility? A drill mixer should have a chuck size that is compatible with a range of paddle mixer attachments, typically a 1/2” keyed chuck for broad compatibility. A dedicated mud mixer or a high-quality drill designed for mud mixing is recommended for superior performance and durability. Renting might be a cost-effective option if you only need it occasionally.
Cordless drills are handy for small projects and batch mixing at low speeds. However, for mixing heavier materials like 80-pound bags of concrete, you might want to consider a heavy-duty mixer or hand mixing.
The Anatomy of a Mixing Paddle
Being familiar with the structure of a mixing paddle is key to achieving efficient mixing results. Helical paddles, for instance, ensure a smooth mix by reducing air bubbles. Twin-blade paddles, on the other hand, provide more surface area contact, enhancing mixing efficiency.
Three-blade spiral paddles are designed for a smooth mixing action, making them perfect for materials like paint and adhesives. If you’re working with liquids, high suction paddle designs, including angular hoops, are ideal as they prevent air incorporation. Find these mixing tools at your local homedepot.
Paddle designs are tailored to handle different materials, such as reactive resin mixtures, preventing clumping or hardening. As such, the right paddle mixer attachment can greatly enhance the efficiency, strength and quality of your mixing.
Step-by-Step Guide to Mixing Like a Pro
Don’t forget safety! Make sure to wear personal protective equipment like safety glasses, gloves, boots, hearing protection, and respirators before you start mixing. Ensure you have proper access to all necessary tools and materials, and obtain permission to use any restricted equipment. Keep a block nearby for added stability if needed.
Let’s start with mixing paint. Insert the drill to the bottom of the can, start it running slowly, and move around until the paint is consistently mixed. Mixing plaster? Start with cold water in a clean bucket, gradually add half the plaster, mix, and then add the remainder until you achieve the correct consistency.
For wallpaper paste, follow these steps:
- Begin by adding water to a container.
- Slowly mix in the paste as per packet instructions to reach a smooth consistency.
- While a paddle mixer creates a smooth and consistent mix for large batches of filler, small quantities are best mixed by hand.
For concrete and grout, proper mixing techniques, establishing a stable base, and accurate measurement of materials are key to achieving a high-quality mixture. And remember to clean your drill mixer and mixing paddle by running it in a bucket of water or white spirit for oil-based paints, using a start-stop motion to remove material, and finishing with a dry wipe-down.
Troubleshooting Common Mixer Issues
Even with the right tools and techniques, issues might arise. If your drill stops working during mixing, it could be due to overheating. Drills with a motor temperature sensor shut off the motor to prevent damage. To prevent overheating when mixing heavy materials like concrete, mix in short bursts as continuous operation can strain the motor.
A regular maintenance routine for your drill mixer is essential for its long life and safe operation. Here are some tips to help you maintain your tool:
- Clean the drill mixer daily to remove any debris or residue.
- Inspect the drill mixer periodically for any signs of wear or damage.
- Follow the manufacturer’s maintenance and care instructions for your specific drill mixer model.
- Store the drill mixer in a clean and dry place when not in use. By following these maintenance tips, you can ensure the durability and efficiency of your drill mixer for years to come.
Enhancing Your Project Efficiency with Mixers


In DIY projects, drill mixers can provide significant benefits. They save significant time and effort compared to manual mixing, especially when dealing with larger volumes of materials such as concrete, mortar, or multiple bags of Quickrete. With the ability to output up to 1,800 lbs per hour, concrete drill mixer drills significantly reduce mixing times, contributing to faster project completion.
The benefits of using a concrete mixer drill include:
- More uniform mix, reducing inconsistencies and ensuring an even distribution of ingredients for optimal material performance
- Alleviating the physical stress of manual mixing, reducing fatigue and the likelihood of errors caused by tiredness
- Adjustable speed control features, allowing users to tailor productivity to different material volumes and densities, reducing operator fatigue and ensuring consistent performance.
Summary
Drill mixers can revolutionize your DIY projects, enhancing efficiency, reducing manual labor, and facilitating access to a high-quality, consistent mix. By understanding the intricacies of selecting the right drill mixer, comprehending the anatomy of a mixing paddle, and mastering professional mixing techniques, you can take your DIY projects from good to great. So why wait? Start mixing like a pro today!
Certified MTP offers a full line of Concrete Mixing Tubs, Cement Mixers, Stationary Cement Mixers, Concrete Mixers, Concrete Cement Mixers, Cement Mixer Tubs, Concrete Mixer Drill, and Portable Concrete Mixers.
Frequently Asked Questions
What drill is best for mixing mortar?
The best drill for mixing mortar is a 1/2″ corded or cordless drill with a paddle mixer attachment, which provides the necessary torque and low RPM for the task. Choose this option for efficient mixing.
Can I use a cordless drill to mix cement?
No, cordless drills lack the power necessary to mix cement effectively as they are not designed for heavy-duty mixing of thick materials such as concrete. Instead, consider a powerful corded mixer or a mixer/drill with sufficient power for this task.
What factors are important in choosing a mixer?
When choosing a mixer, it is important to consider factors such as viscosity, material volume, power and torque requirements, and chuck size compatibility with paddle mixer attachments. These factors will help ensure efficient and effective mixing for your project and specific needs.
How can I avoid overheating my mixer?
To avoid overheating your mixer, mix in short bursts when dealing with heavy materials like concrete. This will prevent the motor from getting too hot and burning out.
What precautions should I take while mixing?
When mixing, always wear personal protective equipment such as safety glasses, gloves, boots, hearing protection, and respirators to ensure your safety.
Related Blogs for Drill Mixer:
Concrete Mixer Trailer: Get Ready For Your Project
Top Durable Concrete Drum Options for Efficient Mixing
Best Portable Concrete Mixers of 2024: Mixing Mastery
Best Cart Away Mixer for Your Construction Needs
Concrete Mixer Large: Maximize Mix for Construction Projects
Gilson Cement Mixers: Durable Solutions for Concrete Mixing
Mixer for Concrete: The Ultimate Guide to Choosing
Hand Mixer for Concrete: Your Tool for Cement Mixing
Best Concrete Mixer for Drill Transforms Construction Work
Understanding Cement Mixer Cost: A Pricing Guide
Best Cement Mixer Gas Motor Options on the Market
We recommend the Stationary Concrete Mixer for most residential and small construction projects.


