Moisture Test: Tactics for Concrete Floor Assessment

What’s the best way to perform a moisture test on your concrete surfaces? This article answers that pressing question by detailing the practical steps for precise moisture testing to avert flooring problems and maintain structural integrity. Discover the top methods and necessary tools to confidently assess and manage moisture in concrete slabs.
Key Takeaways
-
Proper concrete testing for moisture is critical to prevent flooring failures, maintain structural integrity, and mitigate mold growth, taking into account sources of moisture like the concrete mix, groundwater, and ambient conditions.
-
Effective testing for moisture in concrete methods include the calcium chloride test for surface moisture, the in situ RH test for internal slab moisture, and non-destructive impedance testing for quick assessments, with each offering unique benefits and limitations.
-
Analyzing testing for moisture in concrete results involves considering specific project conditions and manufacturer guidelines, with general acceptable moisture levels usually ranging between 3.5 to 4.5 percent and an RH below 75% according to ASTM F2170 standards.
Understanding the Importance of Testing Concrete Moisture
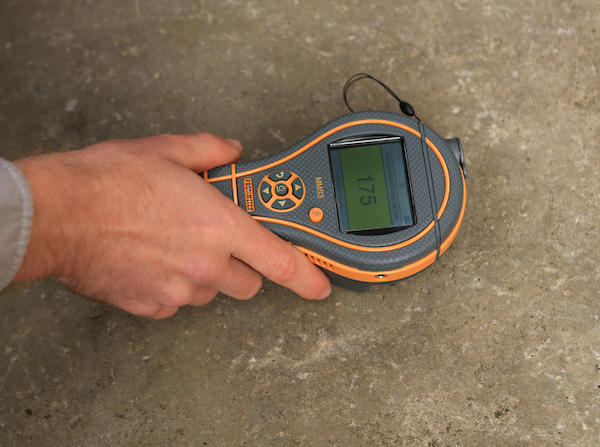
Why does concrete moisture testing matter so much? It’s because proper moisture testing can safeguard against a host of flooring failures, such as discoloration, delamination, blistering, and peeling of the material. An unchecked excess of moisture in a concrete slab can even result in structural damage that includes cracks, bubbles, and delamination, while also creating conditions conducive to mold growth.
Sources of moisture in concrete are diverse, including the initial concrete mix, groundwater, as well as ambient temperature and humidity. These all need careful management to maintain slab integrity. In the absence of a full water vapor barrier, concrete slabs can exhibit up to 100% relative humidity just below the surface, leading to continuous moisture migration into the air and impeding proper drying. Therefore, moisture testing in concrete holds a significance that goes beyond mere benefits; it’s downright crucial.
Identifying the Most Effective Testing Concrete Moisture Methods

While there are several concrete testing for moisture methods, three stand out for their effectiveness: the calcium chloride test, in situ relative humidity test methods, and non-destructive impedance testing. Though surface-level concrete moisture tests like the calcium chloride test are popular, they may not accurately represent the moisture condition deeper within the slab. To ensure accurate results, a concrete moisture test such as the in situ relative humidity test is recommended.
Therefore, a blend of these methods becomes indispensable for indicating moisture conditions in a thorough evaluation.
Calcium Chloride Test
The calcium chloride test, which uses anhydrous calcium chloride, is a widely recognized method for assessing concrete slab moisture levels. This test measures the moisture vapor emission rate (MVER) from a concrete slab by sealing a dish of calcium chloride on the surface under a plastic dome and observing the moisture absorbed after a set period. If the weight of the absorbed moisture exceeds 3 pounds per 1,000 square feet of concrete, the test is considered a failure, indicating high moisture levels according to the ASTM F1869 standard.
Nonetheless, before deploying the plastic sheet for the test, it’s important to make sure the test concrete itself is dry. Damp concrete may distort the moisture readings. While the plastic sheet method is commonly used, its primary focus on surface conditions is a limitation in comprehensively assessing the moisture state of the concrete.
In Situ Relative Humidity Test
The in situ relative humidity (RH) testing method is considered the gold standard for assessing moisture within concrete slabs accurately. Unlike surface-level tests, in situ RH tests measure the moisture deep within the concrete slab, providing a more comprehensive view of the slab’s overall moisture condition. This standard test method involves inserting a sensor into the slab, with the depth of insertion being crucial for accurate results: 40% of the slab thickness for one-sided drying and 20% for two-sided drying.
Prior to implementing the in situ RH tests, both the concrete slab and surrounding conditions should remain stable at service conditions for a minimum of 48 hours. Additionally, the RH sensors must settle for a minimum of 24 hours for an initial reading to reflect true moisture conditions. This method, while more time-consuming, provides a reliable and comprehensive understanding of the slab’s moisture condition.
Non-Destructive Impedance Testing
Non-destructive impedance testing is another critical method in our arsenal for moisture testing. This method measures the moisture content in the upper inch of a concrete slab without causing any damage to the concrete. This quick and straightforward, test method allows for immediate assessments of moisture conditions, making it a valuable tool in time-sensitive projects.
The impedance test determines the percentage of moisture in the top 0.75 inches (20 mm) of the concrete slab. However, readings from impedance testing can be influenced by factors like the concrete temperature and conductivity of materials within the concrete slab surface. It is more useful for comparing different concrete areas rather than providing exact moisture levels.
Selecting the Right Tools for Concrete Moisture Testing
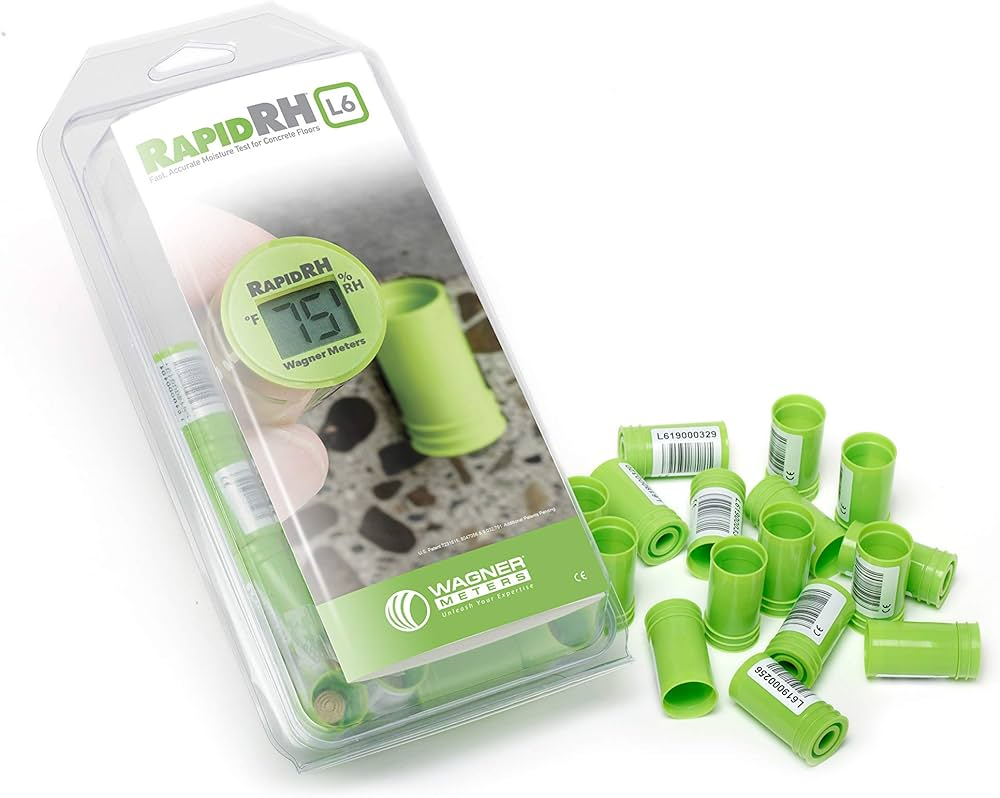
Choosing appropriate tools for moisture and concrete testing holds equal weight as picking the right testing method. Tools such as the Rapid RH L6 Smart Sensors, compatible with the Total Reader or Smart Logger, provide accurate concrete top moisture level readings up to 100% RH and comply with the ASTM F2170 standard for reliable moisture content measurement. Bluetooth connectivity enables real-time moisture data transmission from the sensors to the DataMaster L6 app, aiding in the management and reporting of concrete RH testing data.
Another helpful tool is the moisture meter, capable of surface-level moisture content readings in concrete. Regular calibration of reusable sensors, at least annually or more often under certain conditions, ensures their accuracy, with a mandatory check no less than 30 days before use. Additionally, in situ relative humidity testing benefits from utilizing multiple hygrometer probes, providing a comprehensive understanding of the slab’s moisture condition.
Preparing the Concrete Floor for Accurate Moisture Testing
Before initiating the testing process, one crucial step that demands attention is preparing the concrete flooring failure. To mimic the building’s service conditions, ensure the space where moisture testing is performed is enclosed with an operational HVAC system. Additionally, preparing the test holes involves drilling to the correct depth and cleaning them meticulously with a wire brush and vacuum to remove dust and debris. This meticulous prep work avoids any interference with the sensor’s performance.
After preparing the test holes, follow these steps to calibrate and insert the Rapid RH L6 Smart Sensors properly:
-
Calibrate the moisture sensors correctly.
-
Insert the sensors into the lined holes.
-
Once the sensors are installed, wait for the equilibration period to pass.
-
After the equilibration period, verify the readings.
-
The readings should be stable, not fluctuating more than 1% over five minutes.
-
The readings should also display accuracy within 2% for RH levels between 50 to 90%, as required by ASTM F2170.
Analyzing Test Results and Making Informed Decisions
Once the tests are conducted and data collected, the subsequent vital step involves analyzing the results. Generally speaking, acceptable moisture readings for concrete typically range from 3.5 to 4.5 percent, and the ASTM F2170 standard considers a relative humidity (RH) below 75% as acceptable. However, these are general guidelines, and the specific conditions of your project may require different thresholds.
Flooring manufacturers provide specific allowable concrete moisture content guidelines for the installation of their products, including various floor covering options. It’s essential to consider these guidelines when making decisions about flooring installation. Furthermore, flooring materials rated as ‘moisture-resistant’ may be suitable for installation over concrete slabs with higher moisture emissions, given that the floor covering manufacturer’s requirements are followed to maintain the product’s warranty.
Mitigating Moisture-Related Problems in Concrete Floors
Accurate testing may still leave room for moisture-related issues in concrete floors. Nevertheless, forward-thinking actions can alleviate these problems, sparing you from possible troubles in the future. Solutions such as:
-
Vapor barriers
-
Retarders
-
Concrete subfloor systems
-
Moisture-resistant flooring materials
-
Correct drying and curing procedures
Proper installation of a concrete floor slab is essential for mitigating excess moisture in concrete and concrete floor slabs.
Excessive moisture in slabs can cause surface pressure that leads to the delamination of coatings or overlays. This can be preventable by:
-
Decreasing concrete permeability with mix designs, admixtures, or protective coatings
-
Using vapor barriers or retarders to slow or stop moisture migration from the ground into slabs on grade
-
Installing a sleeper system or subfloor panels to prevent direct contact between flooring material and the concrete slab
-
Using a dehumidifier to reduce room humidity
-
Sealing concrete floors with waterproofing products
These measures can help in handling moisture concerns.
Common Mistakes to Avoid during Concrete Moisture Testing
Concrete moisture testing may seem straightforward, but certain common mistakes can compromise the accuracy of the results. One such mistake is relying solely on surface-based moisture tests like the calcium chloride test. While these tests provide valuable data, they should not be the sole means for determining a slab’s surface moisture conditions as they can be affected by ambient conditions and provide misleading results.
Another common mistake is incorrect sensor installation; RH sensors should be installed correctly, with the closed end going in first. Installing them upside down can lead to inaccurate readings. It’s also important to note that RH sensors are not meant to be reused as they are calibrated for a single use, and their accuracy cannot be guaranteed after removal.
Ignoring visual signs such as damp spots, salt residue, and floor surface defects like cracking or bubbling can also be a costly mistake as these can indicate moisture issues within a concrete slab.
Case Study: Successful Moisture Testing and Mitigation in a Real-World Scenario

Let’s examine a real-life situation to underscore the significance of precise moisture testing and mitigation. IFTI, a leading concrete moisture testing firm, was hired to perform moisture testing for over 1,000 store locations for a major housewares chain. The chain was facing fluctuating mitigation costs due to inadequate moisture testing information.
IFTI’s moisture testing process identified critical flooring concerns, such as high internal and surface moisture conditions. Their findings led to appropriate treatment solutions, saving thousands of dollars per location. Furthermore, IFTI’s Risk Management System indicated that only 20% of stores required moisture mitigation as opposed to the 80% initially presumed, saving over $1.5 million in upfront costs for the retail chain during commercial remodels.
This case study exemplifies the crucial role accurate moisture testing plays for flooring installers, in successful flooring installations and substantial cost savings.
Summary
To wrap up, accurate concrete moisture testing is a vital step in ensuring the durability and integrity of concrete structures. From understanding the importance of moisture testing to identifying effective testing methods, selecting the right tools, and analyzing the results – every step plays a critical role. By avoiding common mistakes and taking proactive measures to mitigate potential moisture-related problems, you can save considerable costs and ensure successful flooring installations.
Certified MTP has the largest selection of concrete testing supplies and meters for concrete moisture testing, showcasing industry-leading brands for Slump Cones, Tamping Rods, Concrete Air Entrainment Meters, slump testers, Concrete Test Cylinder Molds, and fresh concrete testing equipment. We also offer the largest selection of tamping rods for concrete tests.
Frequently Asked Questions
What is a testing for moisture?
A moisture test involves placing a calcium chloride disk under a sealed plastic sheet for 24 hours to measure the amount of trapped moisture and vapor emitted from a surface. This weight difference reveals the moisture content in the tested area.
How do you test moisture in concrete?
To test moisture in concrete, you can use the ASTM D4263 Plastic Sheet Method, which involves taping a polyethylene sheet to the concrete surface for at least 16 hours and checking for visible condensation or darkening of the concrete.
How do you test surface moisture?
To test surface moisture, place a sponge and enclosure face down on the wood, press down, swipe the sponge across the area, and check for a sheen of water left on the board. This indicates the presence of surface moisture.
Why is concrete testing for moisture important?
Concrete moisture testing is important because it prevents flooring failures, structural damage, and mold growth due to excess moisture in concrete slabs.
What are the common mistakes to avoid during concrete moisture testing?
To ensure accurate concrete testing for moisture, avoid relying solely on surface-based tests, placing sensors incorrectly, and neglecting relative humidity testing. These mistakes can compromise the reliability of the results.
Related Blogs
Top Moisture Testers: Perfect Match for Your Farming Needs
Best Moisture Test Kit for Concrete: Your Complete Guide
Equipment Used to Determine Moisture Content in Materials
Moisture Testing: Tips for Accurate Concrete Analysis
How to Deal with Moisture in Concrete Floors
How to Use a Concrete Moisture Testing Kit
