


Effective concrete forms hinge on the right concrete form tools. This guide demystifies the must-haves, from boards to braces, ensuring your concrete pour is level, stable, and smooth. Aimed at experts and home enthusiasts, expect a deep dive into the concrete form tools that transform a good pour into a great one, all while keeping the finer details for later in the article.
Key Takeaways
- Selection and proper alignment of form boards, including correct measurement and cutting, are essential for high-quality concrete slab finishes and require adherence to safety practices.
- Using the right hardware and techniques for concrete forms is vital, including understanding the use of ties, nailing and bracing methods, the right choice and spacing of stakes, and enhancing concrete strength with adequate rebar reinforcement.
- Precise leveling is critical in concrete formwork, utilizing concrete form tools like builders and laser levels to verify elevation and squareness, with an emphasis on post-pour maintenance to ensure the longevity and durability of the concrete structure.
Choosing the Right Form Boards and Concrete Form Tools

The first step in your concrete project is to select the appropriate form boards. The straightness of your lumber plays a significant role in the alignment of your form boards, which in turn, contributes to the professional finish of your concrete slab. A well-selected and properly aligned form board can be the difference between a mediocre result and a stunning one.
So, what’s the process of selecting the right form boards? The answer lies in understanding the types of form boards, accurate measuring and cutting, and proper setting up of the form boards. Let’s explore these aspects in detail.
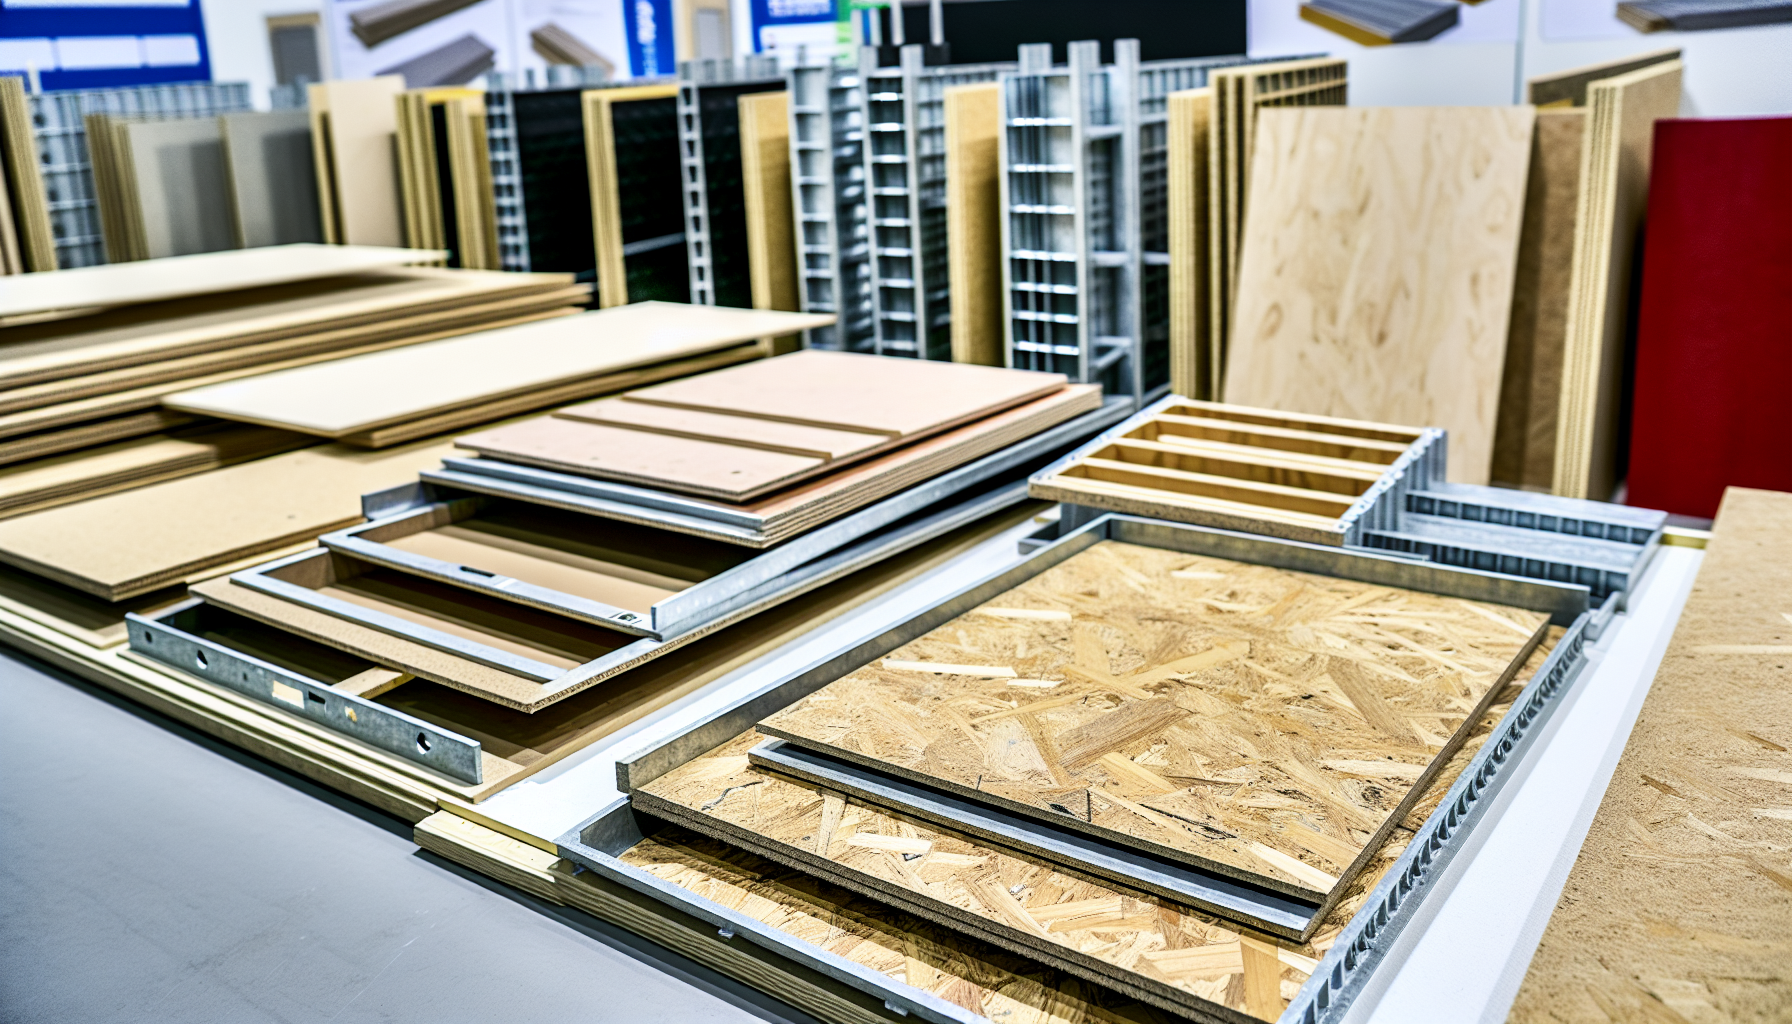
Types of Form Boards
Form boards come in a variety of types – plywood, MDF, and metal forms being the most common. Each type serves a different purpose, and the choice depends on the specifics of your concrete project.
For instance, MDF form boards are typically used when you need to secure the forms to the stakes for stability. Nailing them level with and almost touching the string line, you start at one corner stake and move to join the next after leveling. It’s important to note that the use of form boards also depends on the regulations of your local building department, which might require specific permits for construction.
Measuring and Cutting
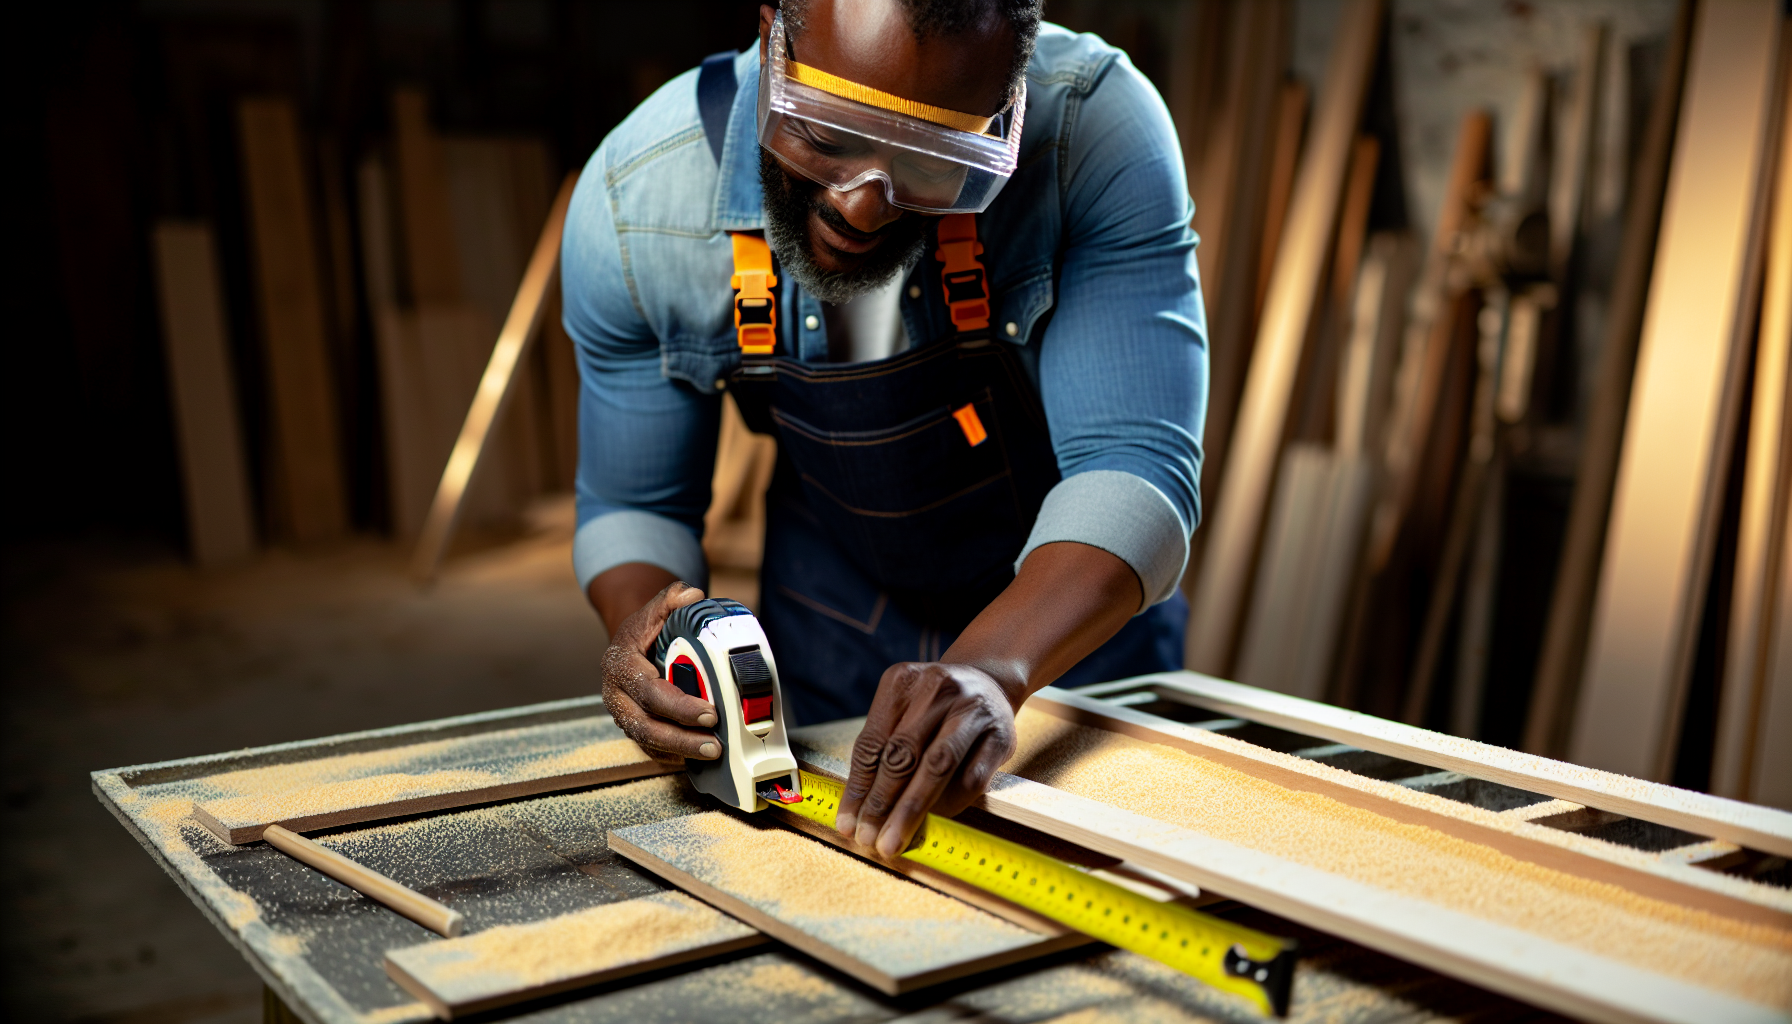

For a perfect fit, accurate measurement and cutting of form boards is paramount. It’s not just about precision; it’s also about safety. When working with form materials, remember to put on your safety gear:
- Long sleeves
- Full-length pants
- Waterproof boots
- Waterproof and dust-resistant gloves
This helps protect workers from skin exposure to concrete dust and chemicals.
Before you begin, conduct a comprehensive inspection of the materials. Make sure they are properly stored and secured to prevent falls. Follow posted sign instructions and adhere to safety guidelines. Also, it’s essential to reach out to the local building department to ascertain the necessity of a building permit and the permissible location for construction in relation to lot lines.
When it comes to cutting form boards at an angle, there’s a proper procedure:
- Lay the boards toward the uncommon wall angle.
- Mark the cut lines.
- Cut the boards.
- Secure the joint.
Setting Up Form Boards
The art of setting up form boards requires both precision and patience. The initial step is to drive four stakes to roughly indicate the corners of the new slab, providing the initial outline for setting up the form boards. To ensure stability of a 4-inch slab, it’s advisable to space the stakes 32 inches, depending on center.
Batter boards come in handy for intricate shapes and large critical layouts to verify the layout as forming progresses, ensuring ongoing precision. A well-set form board will provide a sufficient basis for a stable and secure concrete pour.
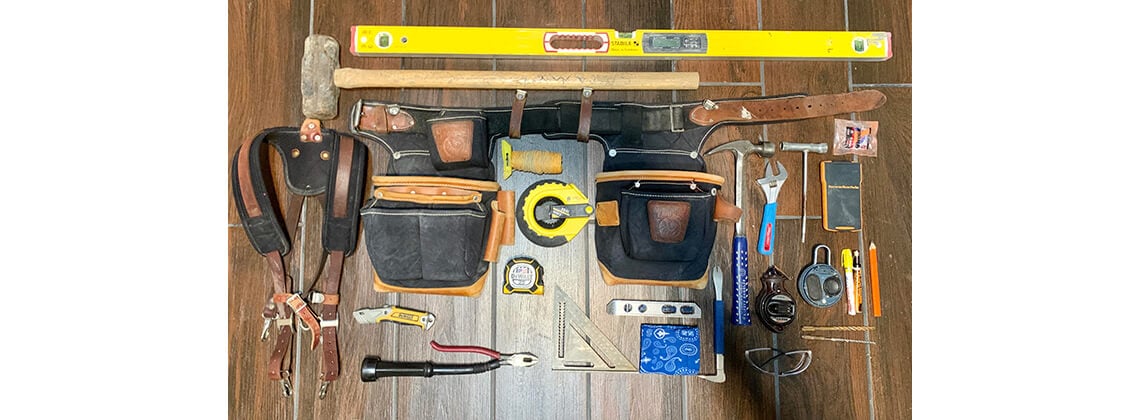
Essential Hardware for Concrete Forms Tools

In constructing concrete forms, the right concrete form tools can significantly impact the outcome. Some of the key components include:
- Wall/heavy ties
- Bridge deck
- Plywood
- Lumber
- Fiber tubes
- Steel forms
For instance, the WTF adjustable wall bracket is intended to be used with the WTF aluminum waler board. However, it can also accommodate 2×4 lumber, providing versatility beyond its original application with the WTF aluminum waler board. But the selection of hardware doesn’t stop at choosing the right components. It also involves understanding how to use them effectively, such as mastering nailing and bracing techniques, choosing the right stakes, and reinforcing with rebar.
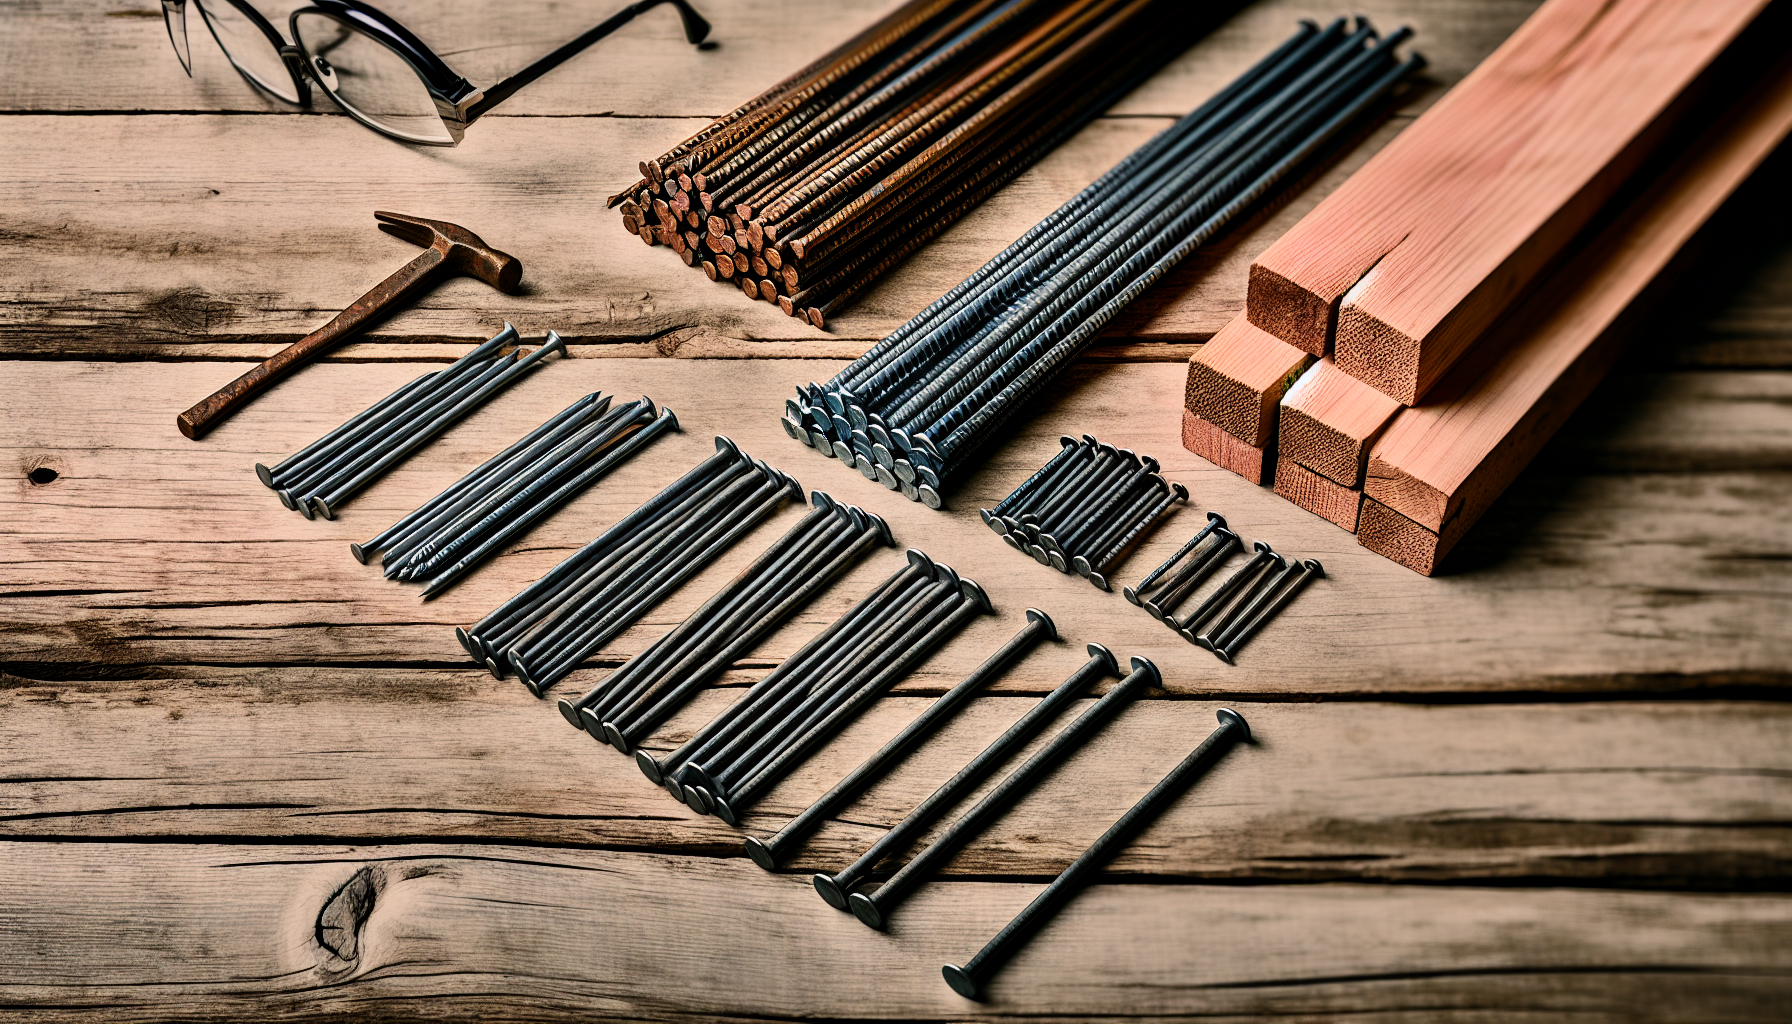
Nailing and Bracing Techniques
To ensure the strength and stability of your forms, nailing and bracing techniques are critical. Duplex nails are frequently used for concrete forms due to their strength and ease of removal once the forms are no longer required. In fact, using just a row of two nails for each connection point can provide the necessary support and stability.
Securing the forms to the stakes for stability involves:
- Nailing them level with and almost touching the string line.
- Starting at one corner stake, move to the second after leveling.
- Using at least one nail every 6 feet along the stake to prevent bowing.
- Holding a sledgehammer behind the stake to absorb shock while nailing.
Bracing offers supplementary stability to the concrete forms, effectively countering lateral loads and reducing the risk of potential damage.
Choosing the Right Stakes
Selecting the appropriate stakes for your form boards is also vitally important. Various types of stakes like:
- flat stakes
- steel stakes
- wood stakes
- round stakes
- square stakes
are used in concrete forms. Typically, round steel is used for form boards.
Selecting the right stakes depends on the size and depth of the pour, the dimensions of the wood boards, and the distance between stakes. For a 4-inch slab, it’s advised to space the stakes a minimum of 32 inches on center and drive them deep enough to provide firm support, taking into account the soil stability.
It’s also worth noting the benefits and drawbacks of wooden and metal stakes. Wooden stakes are easy to attach, favored for bracing, and are more cost-effective in the short term, but they are susceptible to warping, shrinking, and swelling.
Metal stakes, on the other hand, are durable, reusable, cost-effective in the long term, and resistant to splintering, rust, and corrosion.
Reinforcing with Rebar
Your structure gains strength and durability when you reinforce your concrete forms with rebar. Rebar enhances the tensile strength of the concrete, increasing its resistance to cracking and breaking under tension.
The proper placement of rebar in concrete forms involves securing all necessary bars in their designated positions and verifying the correct placement of horizontal and vertical rebars in a footing according to the plans. Common errors to avoid include improper steel positioning, lack of thorough planning, inadequate rebar placement, insufficient concrete cover, incorrect rebar splicing, and disregarding building codes.
Choosing the appropriate rebar size, weight and type for the specific project is crucial and should be in accordance with local building codes and engineering specifications.
Leveling Tools for Precision
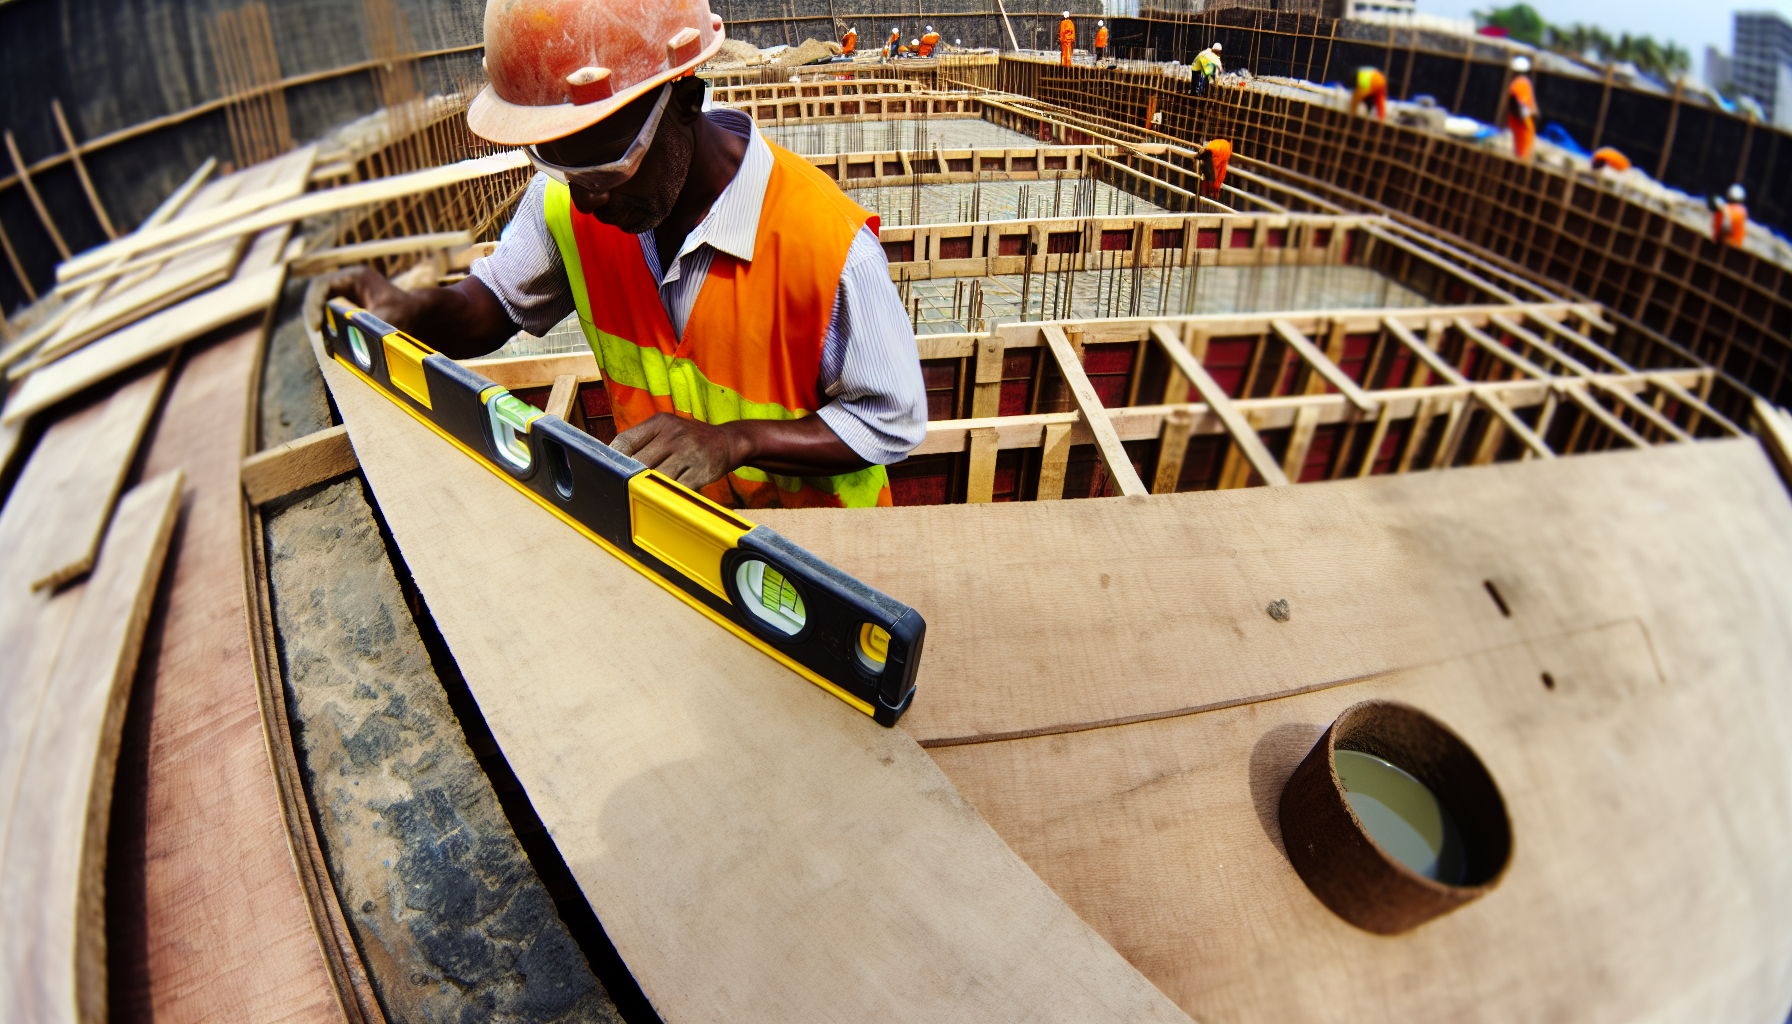

To achieve precision, which is key in concrete form construction, leveling tools are indispensable. There’s a range of levels including:
- torpedo
- string line
- carpenter’s
- laser
- post
- angle
- bull’s-eye
- laser plumb levels
Additionally, power trowels, bull floats, vibrating screed rulers, and vibrating trusses are also employed in this context.
Concrete professionals utilize the builder’s level to determine the grade for the top of the concrete and may also employ a combination of a line level and string or a builder’s level to assess the ground slope. For a comprehensive tutorial, individuals can refer to instructional videos, services such as those provided by the Concrete Network.
Ensuring precision with leveling tools involves:
- Carefully adhering to the manufacturer’s instructions
- Preparing all necessary tools and supplies in advance
- Thoroughly cleaning the work area floor before applying any compounds or materials.
Using a Builder’s Level
In concrete forming, a builder’s level, an optical instrument, is used to verify elevations and establish level points. Specific variations like the standard builder’s level and the transit level are designed for concrete formwork to guarantee accurate height and alignment for a level and uniform pour.
Utilizing a builder’s level involves the following steps:
- Mount the level on a tripod.
- Level and calibrate the instrument.
- Identify a reference point on the formwork.
- Position the leveling rod at the reference point.
- Align the rod through the scope.
- Conduct measurements for level and alignment.
A builder’s level improves accuracy by:
- Establishing points in a straight line
- Setting stakes for the form wall
- Ensuring that the forms are set at the correct height and alignment for a level concrete pour.
Checking for Square and Straight Edges
For precision, it is essential to check for square and straight edges in your form setup. To verify the squareness and straightness of edges in concrete forms, it is crucial to utilize a tape measure, string, and screeds. These tools are indispensable for ensuring precise edges and proper alignment of the form setup.
To ensure the squareness of concrete forms, it’s important to confirm the equality of parallel sides and measure the diagonal distances from corner to corner. If these measurements are identical, the form is square. Common mistakes like neglecting the fundamental principles of framing for level and square structures, failing to measure both internal diagonals for squareness, and not consistently verifying accuracy throughout the setup process should be avoided.
Remember, improperly verifying the square and not straighten the edges can result in significant implications, including misfitting beams, joists, and other structural elements, which can jeopardize the integrity and aesthetics of the ultimate concrete structure.
Adjusting for Accuracy
A critical step in the process is adjusting form boards for accuracy and precision. The necessary tools for this task comprise:
- A caliper
- Batter boards
- Concrete form corners
- A form board bracket system
- Rebar
- Stakes
- Screws for measurement, setting up, and making adjustments.
Aligning form boards involves utilizing adjustable forms or form braces for precise positioning and alignment, and using a maul to tap stakes for leveling. It’s important to review alignment properties, confirm proper centering within the layout, and carefully assess for any modifications that could impact alignment. Keep in mind that inaccurate form board alignment can result in random or aligned cracking and increased deflections in the finished product.
Protecting Yourself and Your Work

There are potential hazards associated with working with concrete. You need to safeguard against skin irritation, chemical burns, and eye irritation resulting from exposure to fresh concrete or cement-based products. In case of skin contact with wet concrete, rinse the affected area with cool, clean water and a pH neutral or slightly acidic soap. If skin irritation occurs, flush the skin with vinegar or another mildly acidic substance to counteract the alkalinity.
Apart from personal safety, you also need to care for your work post-pour. Clean the face of the concrete forms after each pour and remove the forms approximately 24 hours after pouring the concrete. Let’s delve deeper into how to protect yourself and your work during concrete form construction.
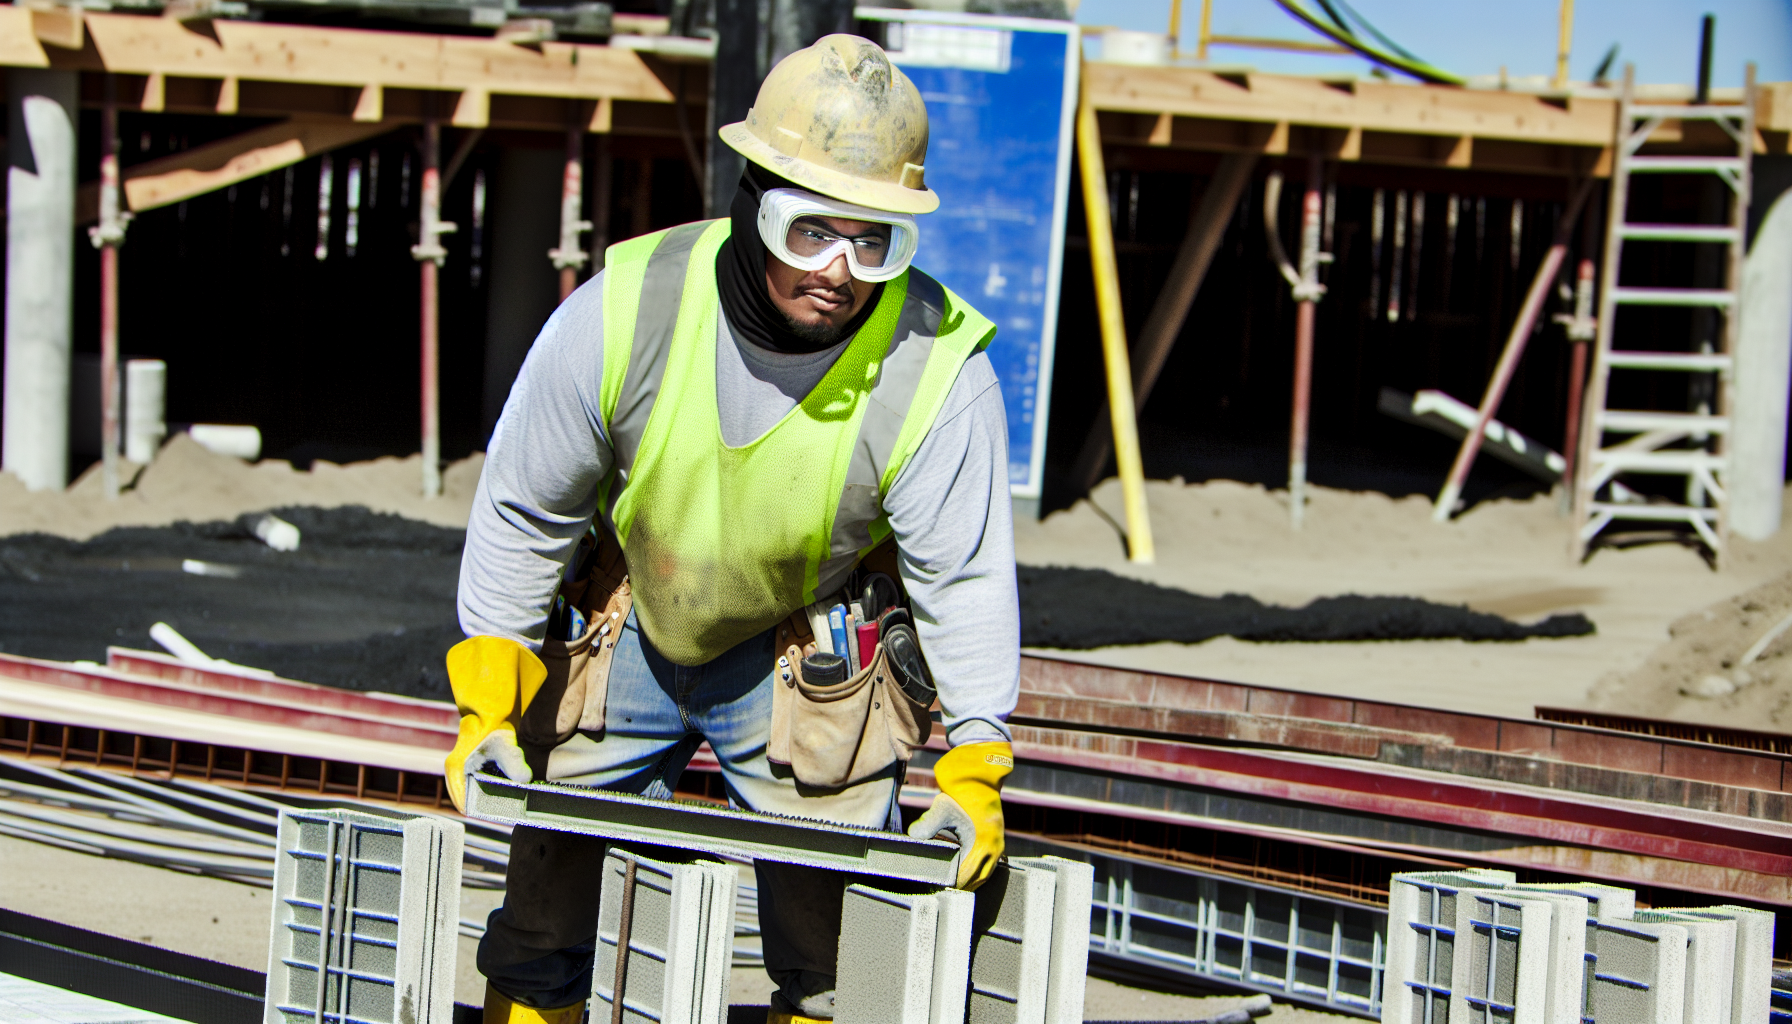
Safety Gear Essentials
When working with concrete and form materials, safety gear is of utmost importance. The necessary safety equipment includes:
- Long sleeves
- Long pants
- Waterproof boots
- Waterproof and dust-resistant gloves
This helps protect workers from skin exposure to concrete dust and chemicals.
When working with form materials, it’s important to conduct a comprehensive inspection of the materials prior to installation. Ensure they are properly stored and secured to prevent falls. Always be mindful of safety measures in construction site scenarios, such as following posted sign instructions and adhering to safety guidelines.
Preparing the Pour Site
Preparing the pour site is an important step before starting the pouring process. Reach out to the local building department to ascertain the date and necessity of a building permit and the proximity to lot lines permissible for construction. To ensure the evenness of the ground before concrete pouring, use a level to inspect for any irregularities. In case of any depressions, they should be filled with gravel and compacted firmly.
Clearing debris before pouring concrete facilitates a solid and even foundation, enabling proper sub-base compaction and mitigating the occurrence of unsightly random cracks. To mark a concrete pour site accurately, drive four stakes to indicate the corners and width of the slab and utilize a line level and string to ensure precise marking of the site.
Post-Pour Care
Just as crucial as the preparation and pouring process, is the post-pour care. The most effective techniques for concrete curing post-pour with concrete form tools involve:
- frequent watering (moist curing) for the initial seven days
- application of a densifier to improve hardness and durability
- utilization of methods such as flooding, plastic coverings, wet burlap, or a liquid membrane curing compound to avoid rapid drying and potential defects.
It’s important to consider the following factors when curing concrete:
- Air temperature
- Humidity level
- Wind speed
- Surface temperatures
- Water
- Dry concrete mix being used
Elevated temperatures can expedite moisture evaporation in the concrete, whereas lower temperatures can impede the curing process. Concrete undergoing repeated freeze-thaw cycles during the curing phase is at risk of expansion, cracking, scaling, and crumbling.
Advanced Concrete Form Tools and Techniques
After mastering the basics, you can explore advanced techniques for creating unique and complex concrete forms. Specialized form systems in concrete construction encompass various types, including:
- Decorative concrete forms
- Aluminum forming systems
- Climbing formwork systems
- Patented concrete forming systems
- Insulating concrete forms (ICFs)
- Steel-Ply concrete forming system
These techniques can serve multiple purposes, from insulation provision and decorative effects creation to accommodation of complex architectural requirements. Managing large-scale concrete form projects requires clear goals and milestones, strong communication, robust team collaboration, and regular video project updates. Detailed schedules, resource allocation, and milestone setting are essential to avoid conflicts and ensure smooth concrete pouring with concrete form tools.
Let’s look at how to create curves and angles, manage large-scale projects, and navigate specialized form systems and concrete form tools.
Creating Curves and Angles
Adding curves and angles to your concrete form design can give your project a unique touch. However, this requires different types of materials like masonite, steel, aluminum, and plywood. Typical difficulties in forming curves and angles involve managing joint tolerances between pieces, ensuring the forms fit together seamlessly, potential creation of weak areas with acute angles, and the challenge of establishing elevation with curving lines.
To accurately create angles, you can utilize the diagonal method by measuring from corner to edge to corner to ensure each corner is at a 90-degree angle, or use a protractor to measure and adjust the angles as necessary.
Managing Large-Scale Projects
A new level of planning and coordination is required to manage large-scale projects with multiple form setups. Some recommended strategies include:
- Developing comprehensive schedules
- Allocating resources efficiently
- Establishing key milestones
- Fostering transparent and efficient communication
Overseeing large-scale concrete form projects comes with its own set of challenges. Coordinating concrete delivery and placement, ensuring level and smooth surfaces, and managing the timing of concrete work can all be significant obstacles. These challenges can be addressed through meticulous planning, seamless coordination among stakeholders, and leveraging the expertise of professionals in the field. Don’t forget about safety considerations, as they are essential for overseeing large-scale concrete projects.
Specialized Form Systems
For unique and challenging concrete projects, specialized form systems can be transformative. These systems include:
- Decorative concrete forms
- Aluminum forming systems
- Climbing formwork systems
- Patented concrete forming systems
- Insulating concrete forms (ICFs)
- Steel-Ply concrete forming system
The applications of these systems are wide-ranging, from insulation provision and decorative effects creation to accommodation of complex architectural requirements. When selecting a specialized form system for a concrete project, consider the size and complexity of the building project, the most suitable type of formwork, the choice of appropriate forming panels, and the decision to either purchase or rent the system based on the project duration and overall cost.
Summary
From choosing the right form boards to mastering advanced clay and concrete form tools and techniques, we’ve covered a lot of ground in this comprehensive guide. We’ve discussed the importance of using the right hardware, the significance of precision in leveling tools, and the necessity of protecting yourself and your work.
No matter the size and complexity of your concrete project, remember that meticulous planning, proper concrete form tools selection, and safety precautions can ensure a flawless pour. So, go ahead and embark on your concrete formwork journey. With the right knowledge and concrete form tools, you’re poised for success.
Certified MTP offer a full line of Formwork Set-Up, Specialty Tools, and Concrete Form Tools.
Frequently Asked Questions
What is the cheapest way to form concrete with concrete form tools?
The cheapest way to form concrete is by using ready-mix concrete, which can be poured into a prepared wood form and left to cure for cost-effective results.
Can I use 2×4 for concrete forms and concrete form tools?
Yes, you can use 2×4 boards for concrete forms, as long as the slab is not a bit too thick. Just make sure to secure them in place with wood stakes and deck screws for stability.
How long do concrete forms stay on?
Concrete forms for walls and columns can be removed after 24-48 hours, slabs after 3-4 days, and soffits after 1 week to ensure the concrete has enough strength to prevent cracking and has started to contract as it cures. Keep an eye on the curing process to determine when it’s safe to remove the forms.
What are common sizes of concrete forms?
Common sizes of concrete forms typically include 4′ x 8′ panels in thicknesses ranging in thickness from 19/32 to 3/4. It’s best to check with a dealer for availability in your area.
How do you hold concrete forms in place?
To hold concrete forms in place, brace the forms with 24 stakes and kickers every two feet for support, and use wood screws for stronger attachments instead of nails. This brace will ensure straight sides and prevent the concrete slab from pushing the form boards outward.
View full line of Concrete Forming items and Concrete Tremie Pipe and Products
View the popular Bon Tool 12-700 Concrete Form – Straight Steel – 10′ X 4″
Related Blogs for Concrete Form Tools:
What are Concrete Forms: 11 Things You Need to Know
Guide to Steel Column Sizes: Dimensions for Your Projects
Top Adjustable Steel Column Choices for Sturdy Support
Large Concrete Molds and Forms: Maximizing Efficiency
Structural Steel Column for Your Project: Guide for Choosing


