


Looking to create a precise and reliable concrete mold for your next project? This guide will take you through the essential steps of how to make a concrete mold, from selecting suitable materials to the finessing of the final product. Whether you’re aiming for intricate detail with silicone rubber or crafting sturdy countertops with wood molds, you’ll find practical tips and innovative techniques to ensure your work is not just effective but also efficient. Let’s start shaping your concrete casting skills with these proven methods.
Key Takeaways
- Selecting the right mold material is essential to discoverng how to make a concrete mold: use polyurethane for durability and color vibrancy, or silicone for capturing detailed designs.
- Prepare your workspace with protective coverings, solvent dispensing cans for cleaning, and HDPE pails for mixing—keeping it organized and efficient.
- Enhance your concrete projects with textures and finishes, use release agents for easier demolding, and consider innovative techniques, like foam inserts or 3D printing, for design flexibility and efficiency.
Right Material when Learning How to Make a Concrete Mold
Deciding on the right material for your mold can often feel like a balancing act. Polyurethane rubber molds, known for their durability, are a great choice if you’re planning for frequent long-term use and for the process of learning how to make a concrete mold. Plus, they give your concrete cast a vibrant color that’s hard to achieve with other materials.
However, if you’re looking for flexibility and excellent detail, silicone rubber molds might be your best bet. They are a bit pricier and denser than polyurethane rubber, but their ability to capture intricate designs makes them worth the extra cost. For detailed features like sink molds and edges, rubber molds are typically a go-to choice and are commonly attached with silicone caulk.
Ultimately, the choice between polyurethane and silicone depends on your project’s specific needs. Whether it’s the vibrancy of color or the level of detail you’re after, both materials offer unique benefits to make your concrete casting project a success.
Preparing Your Mold-Making Workspace
It’s vital to organize your workspace with the necessary materials before starting your project. Start by covering your work tables with wax paper to prevent polyurethane rubbers from sticking to surfaces. Use plastic sheets on the floor, especially in areas where rubber is mixed, to keep your workspace clean and free from spills.
For your workbench, consider Ultra High Molecular Weight (UHMW) polypropylene for its non-adhesive properties with polyurethane rubbers and high chemical resistance. And for your mold-making base, melamine-laminated particle board is a great choice as cured rubber is easier to clean from this material.
Remember to include cleaning tools in your setup. Keep solvent dispensing cans handy for cleaning your mixing tools with solvents like denatured alcohol. Also, consider using high-density polyethylene (HDPE) pails as mixing containers. They are reusable and easy to clean, making them a sustainable and efficient addition to your workspace.
Crafting a Silicone Mold: How to Make a Concrete Mold

The process of crafting a silicone mold can be exciting. Here are the steps to follow:
- Begin by selecting a simple object to serve as your master mold.
- Prepare a base using a plastic bottle.
- Construct a watertight mold housing with a water bottle tube and a plastic support band.
Next, follow these steps to create your silicone mold:
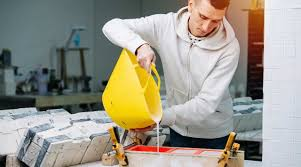
- Calculate the volume of silicone needed for your project.
- Mix the silicone caulking with corn starch to create a molding compound.
- Apply this mixture evenly over your master object, covering all its details.
- Let it cure.
Once the silicone is cured, cut the mold to remove the master form. Now, your silicone mold is ready to be secured with a screw and the plastic ring for concrete casting. With this process, you can create intricate, custom-made molds for your concrete casting projects.
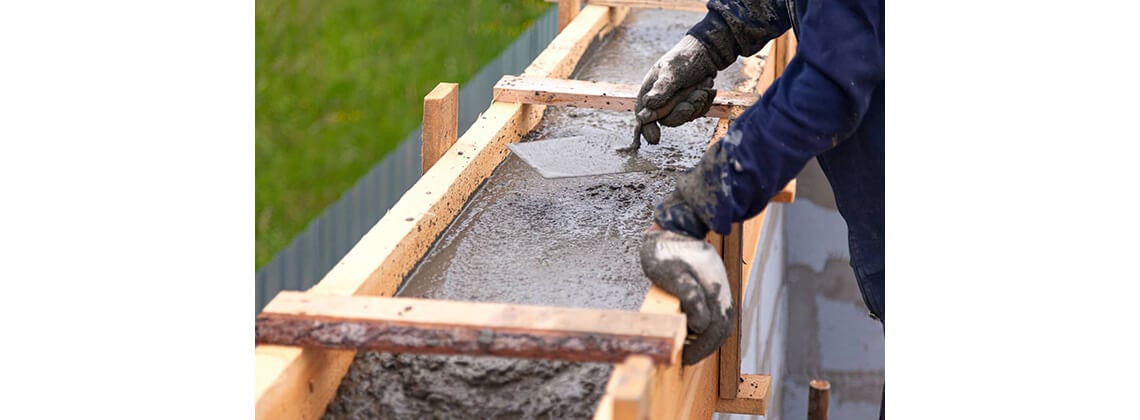
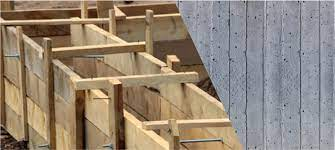
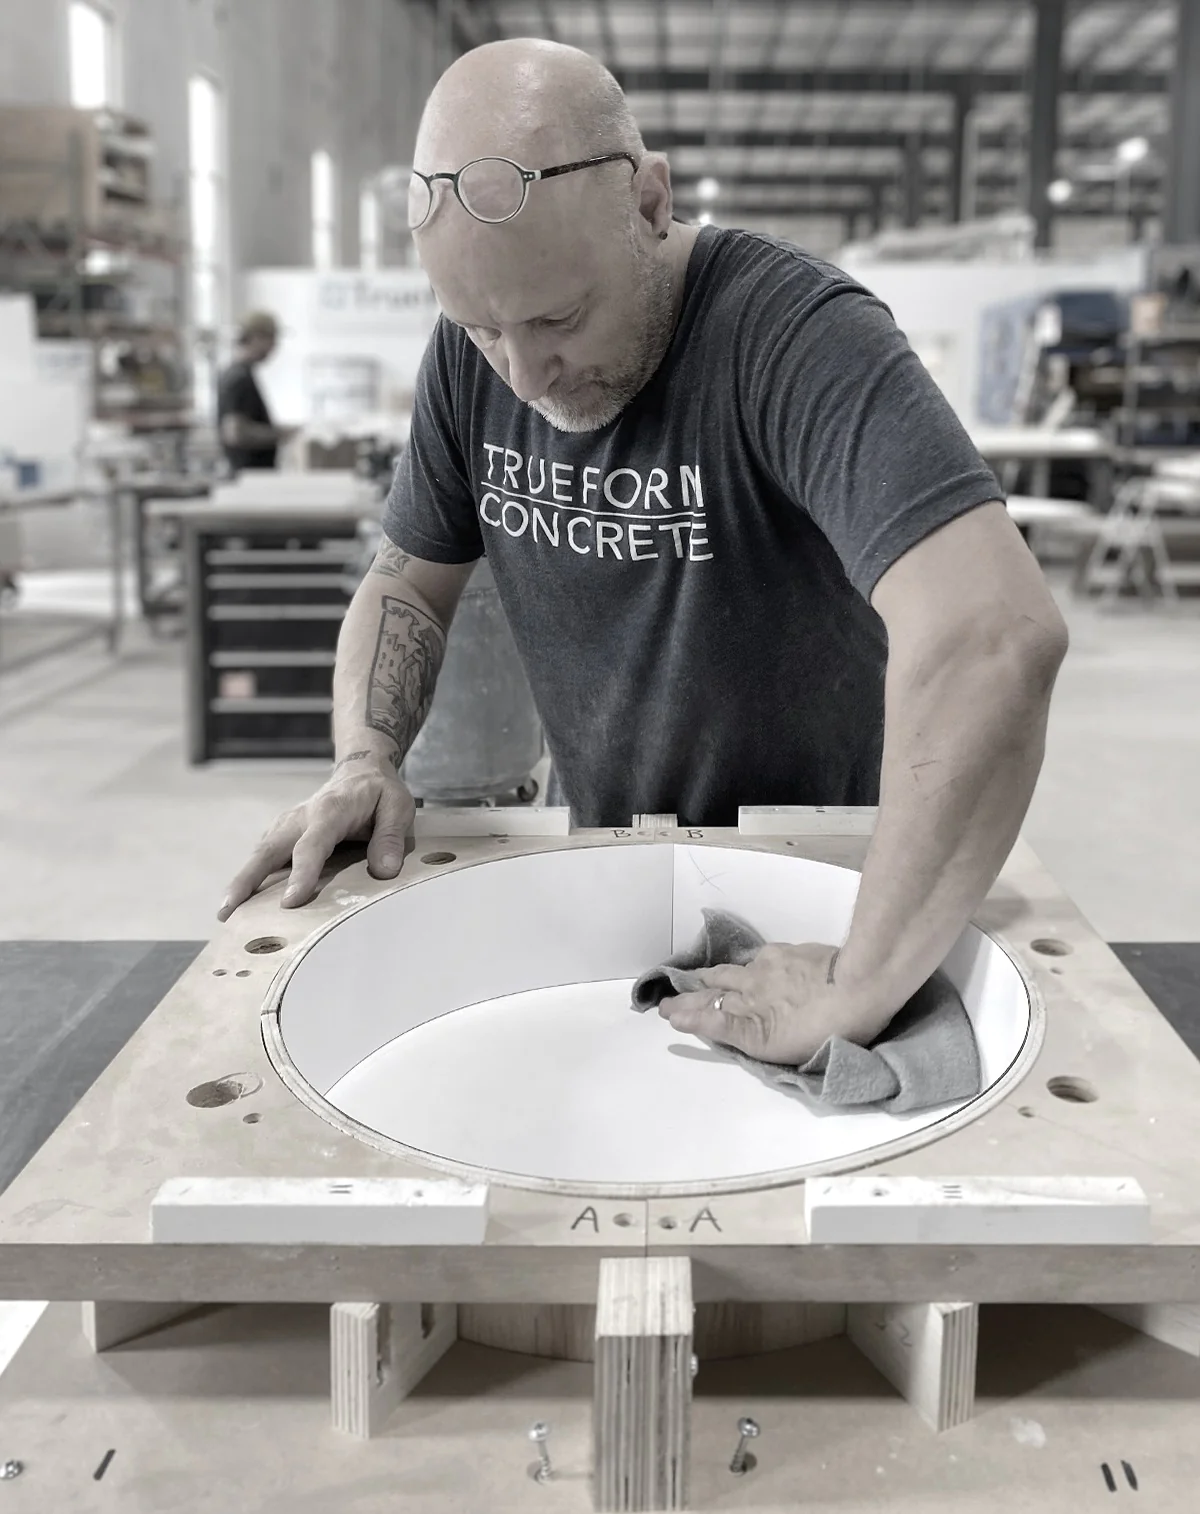
Constructing a Wood Mold for Concrete Countertops
A wood mold is the preferred choice if you’re considering creating a concrete countertop. Melamine-coated particle board is a popular material due to its smooth surface and ease of cleaning. Maintaining uniform width through accurate cutting is vital for the structural integrity of building your wood mold.
Take time to apply edge banding or packing tape to all exposed particle board edges to prevent swelling or deformation from the water in the concrete mix. When assembling your wood mold, fasten the base and walls securely with screws, reinforcing the corners for added strength.
For larger countertop projects, consider creating a support frame from 2x4s to add durability to the mold. And remember, always design your mold to facilitate easy demolding of the finished table or countertop. Usually, this means designing the mold so the walls can be unscrewed from the base after the concrete has cured.
Creating Textured Castings: How to Make a Concrete Mold
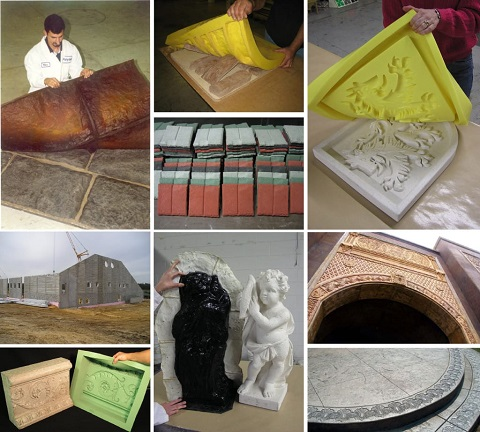

Adding textured concrete castings can enhance the depth and visual appeal of your creations. With a polyurethane rubber mold, you can replicate detailed wood grain textures in your concrete castings, perfect for adding a rustic touch to your projects. And the best part? These rubber molds can be reused multiple times, allowing for consistent production of textured pieces.
Looking for a natural stone-like texture? Consider casting concrete over baking soda. This technique can create the appearance of weathered limestone or fossilized coral, adding an element of nature to your creations. The amount of baking soda and the pre-cast surface texture will influence the final textured appearance of the concrete.
Once the poured concrete has cured and is demolded, any remaining baking soda can be dissolved with water. Further cleanup can be done with an optional acid etch for a finished piece that truly stands out.
Optimizing Mold Design with Release Agents and Sealers
The performance and longevity of your mold design can be significantly improved by optimizing with a release agent and sealers. Release agents like Pol-Ease® 2650 aid in easy and inexpensive removal of cured concrete and enhance the life of your mold.
The application of these agents is crucial. Here are some tips for applying them effectively:
- Clean the molds before application.
- Use a specific spray pattern to create a uniform layer and avoid overuse.
- Consider using automated spray systems to optimize the process.
Following these tips will result in better concrete pouring, quality and a safer work environment.
If you’re working with highly detailed textures, consider applying multiple layers of a sealer like PolyCoat to fully cover the details and prevent the molding rubber from sticking. Silicone molds, known for their excellent release properties, often release concrete without the need for additional release agents.
Innovative Molding Techniques: How to Make a Concrete Mold

Employing innovative molding techniques can enhance design flexibility and efficiency. One such technique involves using foam inserts during the concrete casting process, creating pocket holes within the structure. This results in lighter concrete pieces that are easier to handle and install, such as stools that one can comfortably sit inside.
On-site 3D printing of reinforced concrete is another innovative method. This technique offers several advantages:
- Significant design flexibility
- Reduced transportation costs of large prefabricated items
- Speeds up the construction process by eliminating certain traditional molding constraints.
These innovative techniques open up a world of possibilities for your concrete casting projects, including the use of concrete molds. They allow you to experiment with different designs and methods, such as pour concrete, expanding your creativity and skills in the process, saving yourself and setting the stage for future projects.
Finishing Touches: Sanding and Sealing Your Concrete Piece

After your concrete piece has achieved its shape, it’s time to add the finishing touches. Here’s what you need to do:
- Chisel away any significant bumps.
- Fill in cracks or holes with a concrete crack filler.
- Choose the correct sanding equipment based on the size and location of your project.
Start with a coarse grit sanding pad and progressively move to finer grits, cleaning the surface between each sanding phase to achieve a smooth finish. After sanding is complete, smooth on the cleaned work area thoroughly before allowing it to dry in preparation for sealing.
Apply a finish or sealant to the dry concrete surface to protect it, using a paintbrush for edges and a roller for the surface. The final look of your concrete piece depends on the extent of sanding. Polished concrete requires minimal sanding, while an exposed aggregate finish needs extensive sanding to reveal the embedded materials.
Troubleshooting Issues: How to Make a Concrete Mold
Despite careful planning, you may encounter some challenges. If you find your mold is leaking, fill it with water to cover the object and check for leaks. In case the object is hard to remove, make strategic cuts to the thick silicone mold, aiming to cut in less visible places to preserve the mold’s aesthetic.
Efflorescence, characterized by salt deposits on concrete, is more likely to occur with silicone rubber molds. This is something to consider when choosing between silicone and polyurethane molds. But don’t let these potential hurdles deter you. With a little troubleshooting, you can overcome these issues and continue on your creative journey.
Summary
So, how to make a concrete mold? Creating concrete molds is an exciting journey, from choosing the right material to adding the finishing touches. It’s about experimenting with different textures, incorporating innovative techniques, and troubleshooting issues along the way. But most importantly, it’s about bringing your ideas to life with your own hands. So grab your tools, roll up your sleeves, and let your creativity flow!
Certified MTP has the largest selection of concrete testing supplies, showcasing industry-leading brands for Slump Cones, Tamping Rods, Concrete Air Entrainment Meters, slump testers, Concrete Test Cylinder Molds, and fresh concrete testing equipment. We also offer the largest selection of tamping rods for concrete tests.
Frequently Asked Questions
What makes a good concrete mold?
A good concrete mold should be made of non-porous and non-reactive material that is waterproof or protected from water. This ensures a successful and durable concrete casting.
What materials do you use to mold cement?
You can use melamine, which is available at home improvement stores in the shelving section, to mold cement. It’s easy to cut down to size and work with.
What are the benefits of using polyurethane molds?
Using polyurethane molds for concrete casting has the benefits of durability and producing vividly colored plaster casts.
How can I create a textured concrete casting?
You can create textured concrete castings using polyurethane molds or the baking soda technique, both of which yield unique and natural textures. Give it a try and see which method works best for you!
How can I optimize my mold design?
To develop and optimize your mold design, use proper release agents and sealing techniques to enhance mold performance and longevity. This will help improve the quality of your molded products.


