


The dial indicator seems simple on the surface, but it plays a crucial role in the testing of soils, concrete, and materials. Widely used by construction experts, engineers, and artisans to assess comparative height, the dial indicator provides reliable results with exceptional accuracy. But before we get into everything the dial indicator can do, let’s take a step back and look at how it works. In this blog, we’ll answer the question, “what is a dial indicator,” ways to use it, and how to read one. We’ll also give you our recommendations on the best dial indicators available for all your material testing needs.
What is a dial indicator?
Dial indicators (also known as drop indicators, dial gauges, or runout gauges) are measuring instruments that react to contact pressure and amplify small displacements on a surface to provide measurable results.
Dial indicators are great at measuring small displacements. Suppose you were trying to measure the deviation between two surfaces with a height difference of 7mm (0.27 inches). In that case, you’d struggle to get precise measurements with rulers or calipers. With a dial indicator, you could accurately measure this height change every single time.
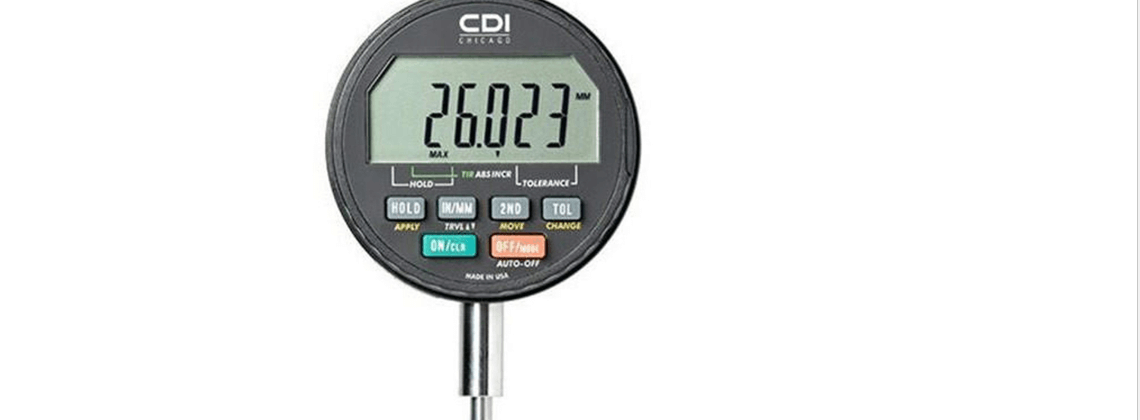
Dial indicators can be either analog or digital. Most analog dial indicators accurately measure small distances to the nearest ±0.008mm. Digital indicators are even more accurate, measuring in the range of ±0.005mm.
The digital indicator is considerably more precise and less prone to human error. That said, because the analog dial indicator is easy to use, fast to set up, and doesn’t need batteries, it is still popular in many industries.
Dial indicators are available in various measurement ranges to accommodate different applications. The most common ranges are 0-1 inch (0-25.4mm) and 0-2 inches (0-50.8mm).
That said, some smaller, specially designed dial indicators may only measure height deviations up to 0.5 inches (12.7mm), 0.025 inches (6.35mm), or 10 millimeters. These ‘mini’ dial indicators are used when a high degree of precision is required, such as in fine machining, watchmaking, or jewelry industries.
We always use dial indicators in conjunction with other tools because they are too sensitive to use by hand. A magnetic base can hold the dial indicator in place and ensure that measurement results are always reliable and accurate.
What does a dial indicator measure?
Dial indicators measure the comparative height difference between two surfaces. They are rarely used for direct height measurements.
For example, if you wanted to measure the height of a metal bracket for use in construction, a height gauge would give you a faster, simpler absolute height measurement. However, when calculating the comparative height of two metal brackets, a dial indicator would be a more precise way to measure the difference.
What is a dial indicator used for?
To give you a better understanding of how a dial indicator works in practice, here are a few common applications for the tool.
What is a dial indicator used for in concrete compressive strength tests
Dial indicators are a common component of compressometers used for concrete compressive strength tests. They can be used to accurately assess the average deformation of concrete cylinders when placed under stress.
What is a dial indicator used for in consolidation testing in soil
Dial indicators are useful when testing for consolidation in soils. Once the soil saturates and expands, the dial indicator can accurately measure the deformation and settlement of the sample to provide information about the soil’s properties.
What is a dial indicator used for in checking spindle runout in machines
Dial indicators are a standard instrument when measuring spindle runout. The tester can place the indicator horizontally and rotate the spindle. The dial indicator will record runout, allowing the tester to make adjustments to align the spindle.
What is a dial indicator used for in assessing surface roughness
The dial indicator is an excellent way to assess the roughness of a surface. For example, you could use the indicator to evaluate the surface finish quality of a casting.
The key components of a dial indicator
To learn what is a dial indicator used for, let’s first explore its key mechanical components.
Case: This refers to the outer case that surrounds the dial indicator. Once the dial indicator is positioned correctly, the case can be rotated to zero the needle. This is an essential step in the calibration process.
Needle/pointer: The needle is positioned in the center of the dial indicator. It spins clockwise when pressure is applied to the contact point and counter-clockwise when pressure is released. The needle points to a graduated scale and can be used to attain the final comparative height measurement.
Graduated Scale: The case contains a graduated scale closely resembling a clock face. In most dial indicators, the scale increases in increments of 0.01mm, and one complete revolution of the needle represents 1mm of pressure applied to the contact point.
More Reading: What are Desiccant Cartridges?
Revolution counter: The dial indicator also contains a much smaller scale known as the revolution counter. This scale counts the number of pointer revolutions in the outer scale. Each number on the revolution counter represents one total rotation (1mm).
Plunger: The plunger is attached to the spindle. It is spring-loaded and fully extended when not in use. It retracts as pressure is applied to it, spinning the needle clockwise. If the plunger retracts 1mm, this will be displayed on the graduated scale, allowing the tester to measure height displacement accurately.
Contact point: The contact point makes contact with the surface that is being measured. It is connected to the plunger. Different contact points are available for different applications. For instance, extended contact points give the dial indicator a longer reach, which can be useful when testing certain materials.
Mounting stem: The mounting stem (or mounting lug) attaches to other pieces of equipment, like a magnetic base. Attaching the dial indicator to a stable base is essential for achieving accurate measurements.
How does a dial indicator work?
The basic premise behind the dial indicator is quite simple. The reading on the indicator is dependent on the upward and downward movement of the plunger.
The plunger extends fully when not in use. It retracts into the mounting stem once you apply pressure to the contact point. This causes the outer scale to spin clockwise. Once the pressure is released, the outer scale spins counterclockwise.
As we know, learning What is a dial indicator used for in measuring comparative height, we need to discuss how this works in practice.
Keep Reading: What Do the Basic Tests on Asphalt Materials Measure?
Let’s say you have a flat rectangular plate that requires the same exact height on each side for proper functionality. You can use a dial indicator to ensure the surface is completely level. Here’s how to do it.
1) First, position the plate on a stable surface and attach the dial indicator to a base to secure it.
2) Then, lower the dial indicator until the contact point reaches one side of the plate. Allow the plunger to retract slightly.
3) Now that the dial indicator is in place, rotate the case to align the zero mark on the graduated scale with the needle’s current position.
4) With the dial indicator secured at a fixed height, slowly move the rectangular plate to position the contact point over the opposite side. If the surface is entirely level, there should be no change. If the needle spins clockwise, this means that the new side is higher than the one you started on. Although, it spins anti-clockwise, the new side is lower than the one you started on.
5) You can then use the graduated scale to assess the comparative height difference between the two sides. For example, let’s assume that the needle span clockwise from 0 to 0.7mm from side one to side two. This would tell us that side two is 0.7mm higher.
As you can see, there’s no need to know the absolute height of the rectangular plate to assess whether it’s completely level. All that matters is the difference between the two sides.
How do you read an analog dial indicator?
Reading an analog dial face is quick and easy. To do so, simply add the number from the revolution counter to the measurement displayed on the outer graduated scale.
For example, let’s say your plunger retracts 17.35mm when coming into contact with a surface. We know that each complete revolution of the needle represents 1mm and that each time the needle revolves, the revolution counter increases by 1.
Therefore, 17.35mm would be represented by a 17 on the revolution counter and 0.35mm on the outer graduated scale.
Dial indicators vs. dial test indicators: What’s the difference?
Despite sharing some similarities, dial indicators (drop indicators) differ from dial test indicators. It’s common to get the two mixed up, and searches for a dial indicator may occasionally bring up information about the dial test indicator. However, there are some distinct differences between the two.
The primary distinction between the dial and dial test indicator is that the dial test indicator contact point is attached to a lever that you can move at an angle. In contrast, the dial indicator has a spring-loaded plunger that only moves up and down.
Dial test indicators are even more precise than dial indicators and are often used to convert tiny lateral movements into measurable readings. They are very helpful when measuring small displacements between two surfaces to a high degree of accuracy. However, they aren’t suited to bigger measurements in the range of 1-2 inches because the pointer is not spring-loaded.
In contrast, the dial indicator’s spring-loaded plunger extends and retracts automatically, providing simple, fast, precise measurements, even for height changes above 1 inch.
Where can I find high-quality dial indicators?
If you’re looking for high-quality dial indicators for your next material test, look no further than CertifiedMTP.
We offer a range of best-in-class dial indicators from industry-leading manufacturers like Gilson Company and Karol-Warner. Whatever your material testing needs, we have a dial indicator for you. From length comparators and compressometers to strain gauge sets and flowmeters, our products are designed to give you accurate, reliable results time and time again.
Looking for something else? Why not get in touch? We’re always happy to help. At CertifiedMTP, we’re committed to making material testing easier, faster, and more affordable for everyone. Contact us today and ask away.


