


The size of cylinder for concrete testing is pivotal for accurate compressive strength assessments. Commonly, cylinders are 4×8 inches or 6×12 inches in size, aligning with ACI and ASTM standards. This article will succinctly clarify these dimensions’ importance, the size of the cylinder for concrete testing, and how they impact the validity of test results.
Key Takeaways
- Select the size of the cylinder for concrete testing based on the aggregate size. Ensure the diameter is at least three times the nominal maximum size of the coarse aggregate and maintains a length-to-diameter ratio of 2:1, following ACI and ASTM standards.
- Proper cylinder specimen preparation is critical, with non-absorbent materials for molds, greased interiors for easy removal, and stringent procedures for filling, layering, and striking off the top surface, per ASTM C31.
- Concrete cylinders require careful initial curing under controlled temperature and humidity, as well as final curing in a moist room or water storage tank to accurately measure the concrete’s compressive strength.
Choosing the Right Size of Cylinder for Concrete Testing

The initial step in gauging concrete’s compressive strength is to select a composite sample of the appropriate cylinder size for testing. The size of the cylinder is influenced by the project’s specifications and the nominal maximum size of the aggregate used in the concrete mix.
The American Concrete Institute (ACI) and the American Society for Testing and Materials (ASTM) specify that the cylinder should have a diameter at least three times the nominal maximum size of the coarse aggregate, with a length-to-diameter ratio of 2:1. Typically, 4×8 inch or 6×12 inch molds are used for casting concrete cylinders, with the smaller size and lighter weight of 4×8 inch cylinders proving popular due to their ease of use.
Nominal Maximum Size of Aggregate Considerations
The nominal maximum size of the aggregate plays a significant role in determining the cylinder mold size. Accurate compressive strength readings mandate a mold size that is at least triple the aggregate’s maximum size.
For concrete mixes with aggregates larger than 2 inches, technicians use wet sieving to remove these oversized materials, ensuring the mold size fits the remaining aggregate size. This standard practice maintains a mold length-to-diameter ratio of 2:1, which is vital for obtaining precise compressive strength readings from test cylinders.
ACI and ASTM Standards
ACI and ASTM standards provide comprehensive guidelines for concrete testing, including acceptance testing of high-strength concrete and choosing the correct size of the cylinder for concrete testing.
For instance, ACI 318-19 requires using the average of at least two 6 x 12-inch cylinders or at least three 4 x 8-inch cylinders, which are concrete test specimens, for acceptance tests of concrete strength.
Moreover, these standards specify that the average of three consecutive strength tests must at least meet the specified strength, usually tested after 28 days unless the concrete construction and documents specify otherwise.
ASTM C31 and ASTM C470/AASHTO M 205 provide standards for concrete cylinder molds that are suitable for the 4×8 inch and 6×12 inch sizes, ensuring compliance with the prescribed norms.
Preparing and Molding Test Cylinders

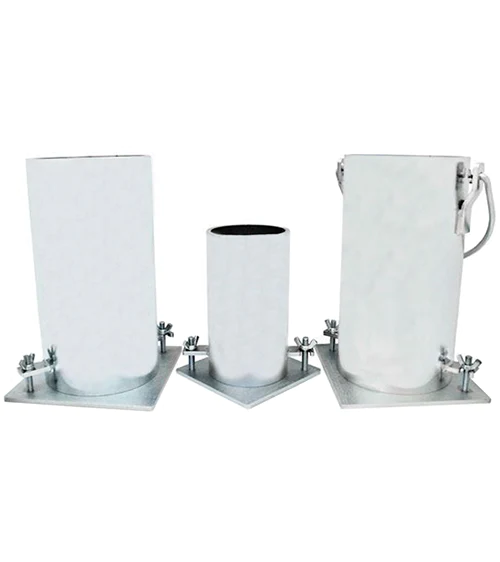
Following the determination of the size of the cylinder for concrete testing, the test process proceeds with the preparation and molding of the concrete cylinders cast. The molds used for creating the test cylinders must be made of a non-absorbent material, such as steel or cast iron, ensuring they do not deform or react with the concrete.
The molding process for composite concrete samples involves the following steps:
- Initiate the process promptly within 15 minutes after creating the sample.
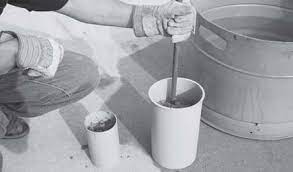
- Layer the concrete mix using a scoop and compact it uniformly in the mold.
- Rod the concrete 25 times per layer, with the number of layers and rodding count varying based on the cylinder size.
- Grease the interior of the molds to facilitate easy removal of the hardened concrete cylinders.
Greasing and Layering
To ensure easy removal of the hardened concrete, workers apply a thin layer of form oil or mineral oil to the interior surface of the concrete cylinder molds. After this greasing process, they carefully layer the concrete mix.
They meticulously carry out the layering, ensuring each layer is not less than 5cm deep. This step prevents void formation and confirms that the concrete is uniformly compacted across the cylinder structure.
Striking Off the Top Surface
After the careful layering and rodding of the concrete mix and after the selection of the correct size of cylinder for concrete testing, the next step is to ensure a flat top surface of the cylinder. This flat surface is pivotal for accurate strength testing. A variety of tools such as a tamping rod, handheld float, or trowel may be used for this purpose. However, a wooden float is specifically recommended to ensure a level surface. The process is guided by ASTM C31, which ensures that the surface is ready for transportation and further testing without the risk of disturbances.
Initial Curing of Concrete Cylinders
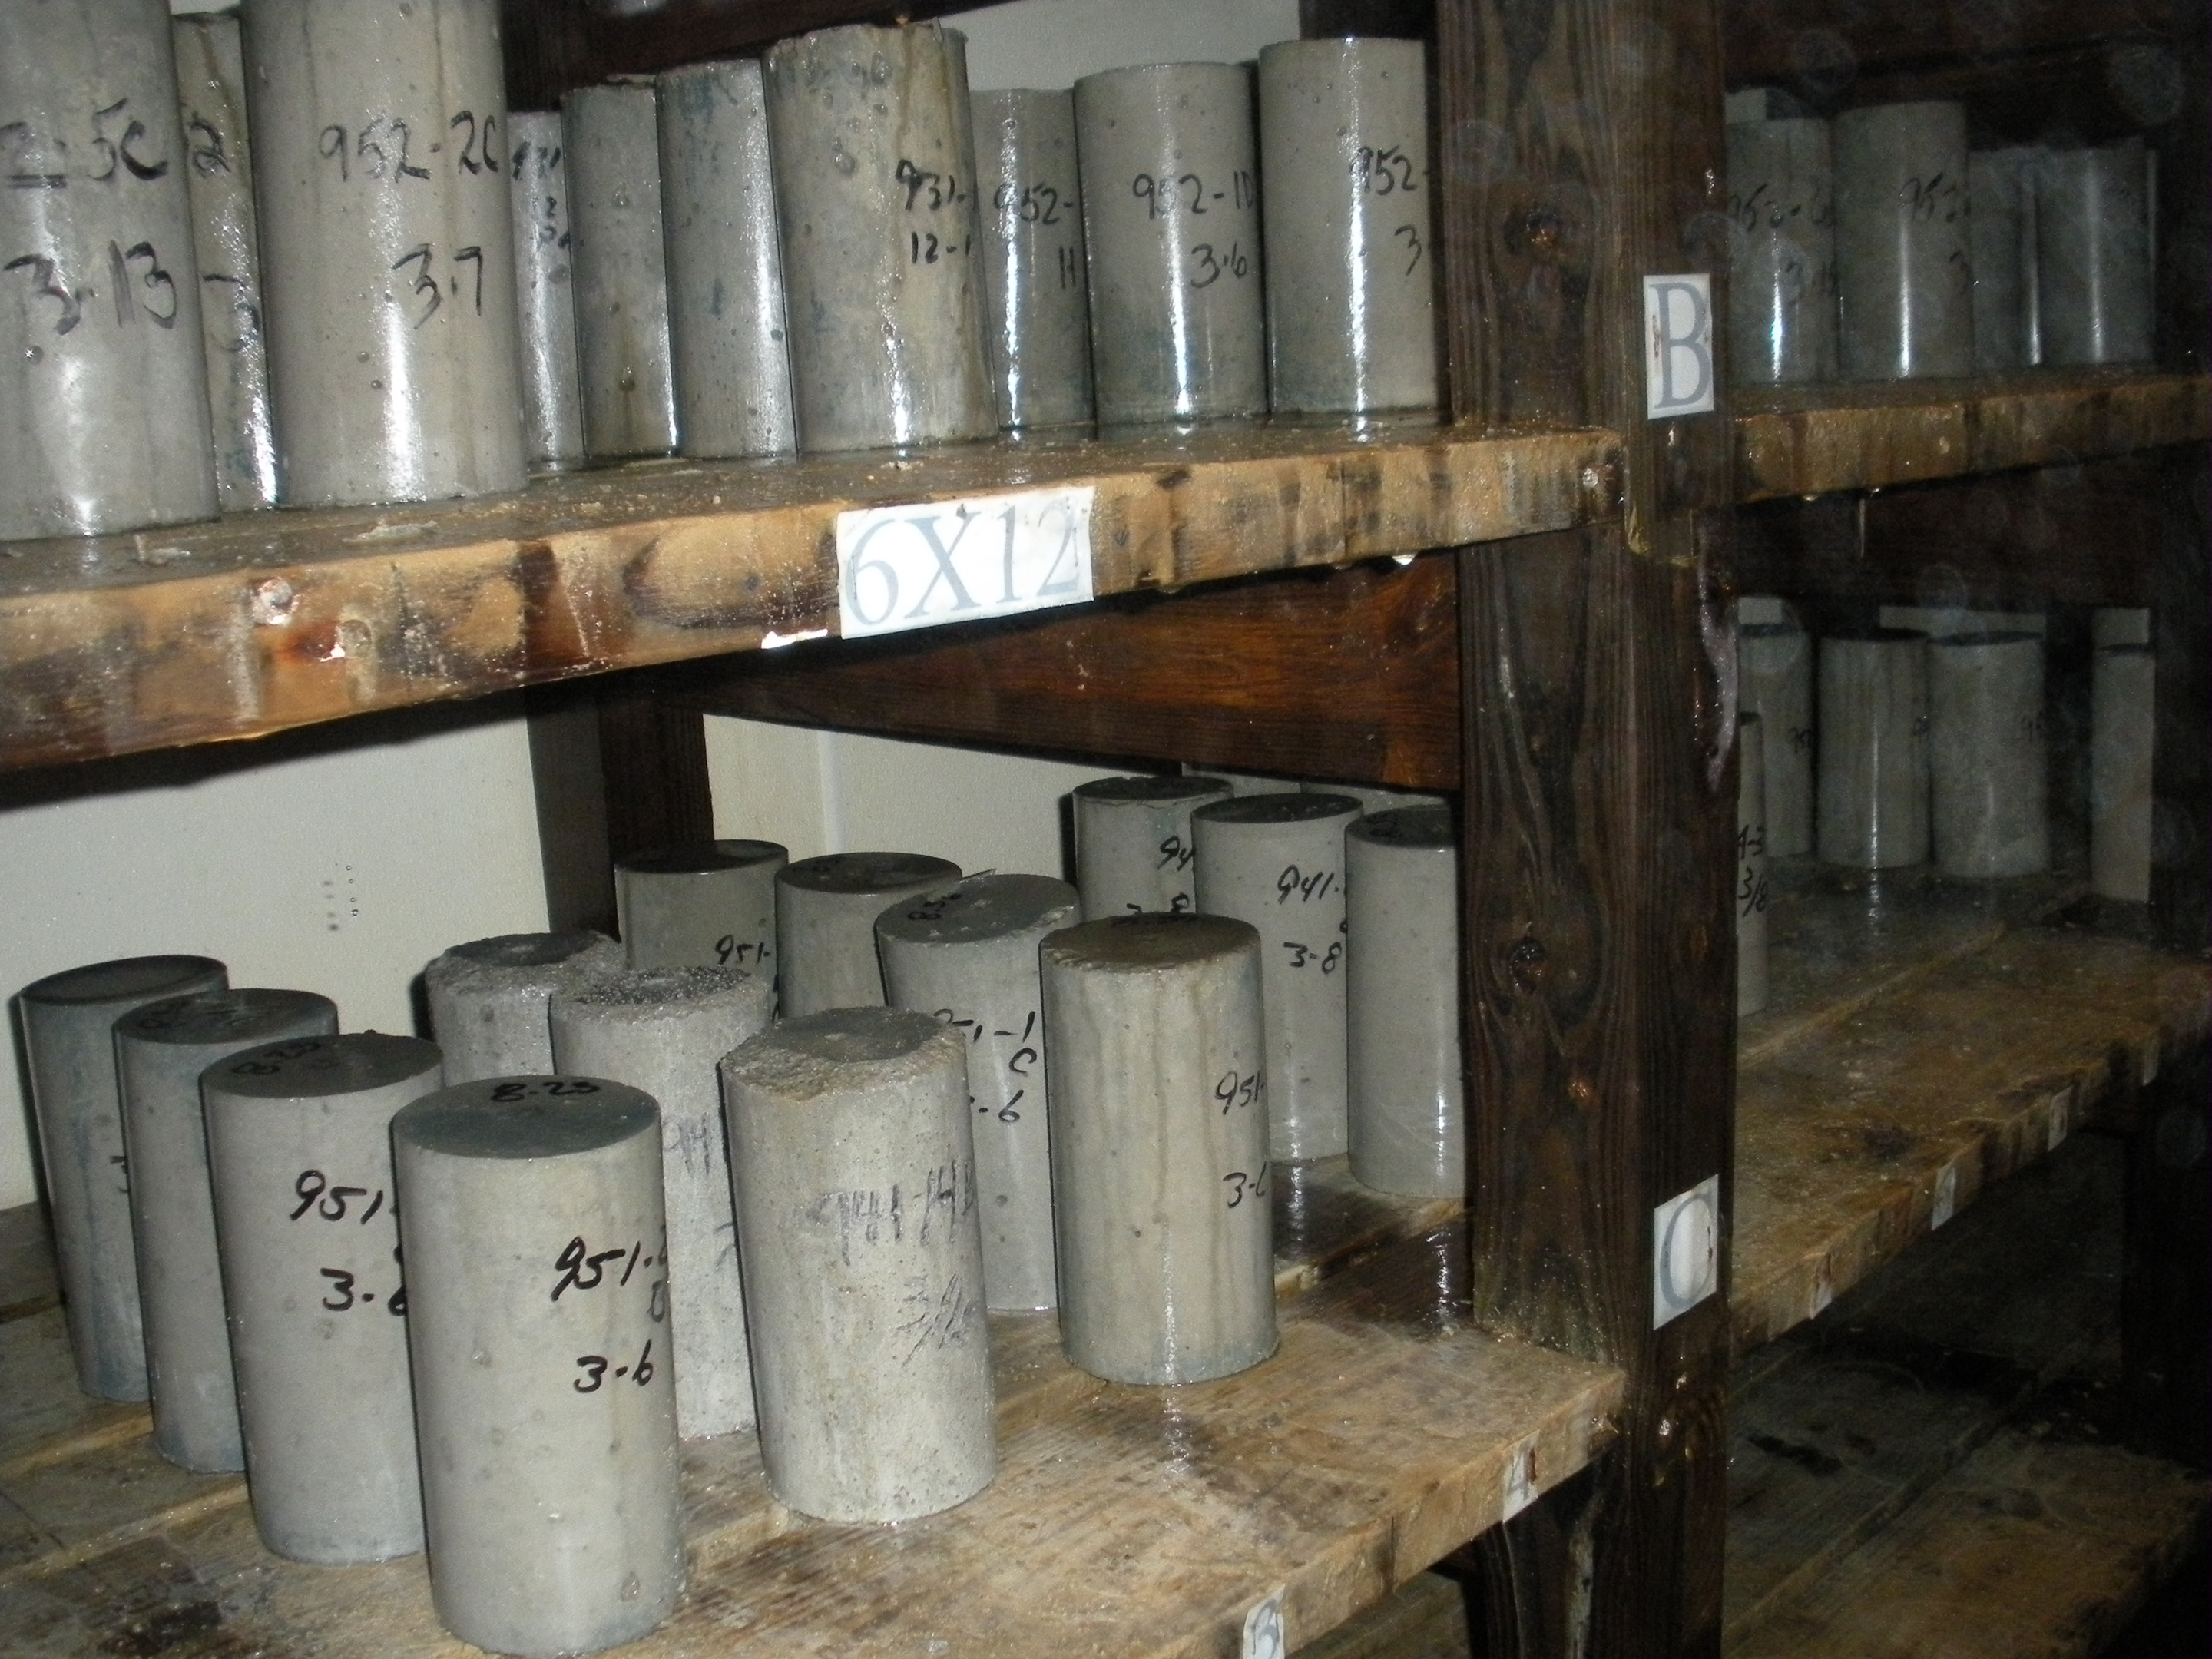

After the preparation and molding of the structural concrete cylinders and selecting the correct size of cylinder for concrete testing, they are subjected to an initial curing process. This step is crucial for the accurate measurement of the concrete’s true compressive strength.
The initial curing conditions should maintain a controlled temperature and relative humidity. Studies have shown that deviations in these conditions can lead to significant variations in the strength of concrete. ASTM C31 specifies the temperature range for the initial curing process, which varies depending on the design strength of the concrete mix.
To prevent moisture loss for up to 48 hours, the test cylinders should be stored in water storage tanks during the initial curing process, ensuring a temperature-controlled environment.
Suitable Curing Environments
The use of boxes, plastic bags, or caps on the plastic-ready mixed concrete cylinder mold enables the maintenance of a moist environment for the initial curing of concrete cylinders. These measures, along with practices such as ventilation or the use of ice in hot conditions, help manage the temperature during the initial curing period.
Commercially available curing boxes, such as the Thermocure II, can ensure the maintenance of correct temperature and moisture conditions. These curing boxes are especially beneficial when the ambient air temperature is likely to fall outside the specified range.
Final Curing Practices Before Testing
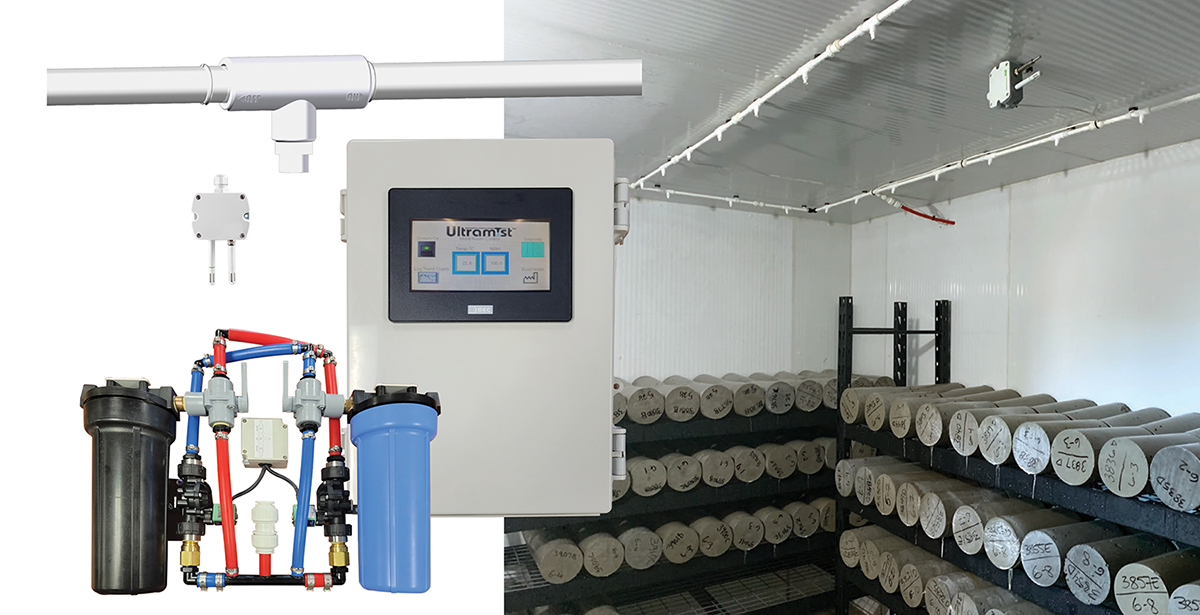

After the initial curing process, technicians subject the concrete cylinders to a final curing process before testing. This includes making and curing concrete for test specimens. They should perform this process in a moist room or water storage tank that maintains a constant temperature, ensuring free water remains on the cylinders’ surfaces at all times.
Maintaining standard curing conditions both in the field and the laboratory is critical to assess the inherent properties of concrete independently from the variable temperature conditions that of the job site. Proper final curing practices ensure:
- Accurate assessment of the concrete’s compressive strength
- Optimization of concrete mixtures
- Reduction of destructive testing
- Overall cost reductions.
The transition from Field to Lab
The transition of test cylinders from the specimens in the field to the lab is a critical phase that requires keen attention. Protection against mechanical damage and moisture loss is essential for concrete specimens during transportation. The transportation time should not exceed 4 hours to ensure the integrity of the specimens.
Moreover, the specimens should be protected during transport with insulation materials such as plastic, wet burlap, or wet sand to prevent moisture loss. During transportation, suitable cushioning material is used to prevent damage from jarring. This helps to protect the items being transported.
Compressive Strength Testing and Analysis
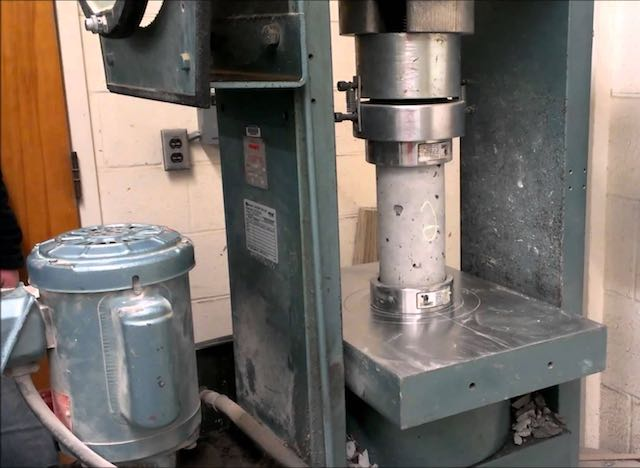

Now we venture into the final stage of the strength development process – the compressive strength testing and analysis. This process follows the established standard of ASTM C39/AASHTO T 22.
Ensuring the size of cylinder for concrete testing retains moisture from the respective curing environment is crucial before initiating testing. To determine the compressive strength, a continuous load is applied to the cylinder until it fails. This process helps in understanding the ability of the material to withstand pressure. The diameter of the concrete cylinder is measured at two perpendicular points at mid-height and averaged to ensure an accurate calculation of compressive strength.
Ensuring Axial Load Application
The application of load during compressive strength testing should be evenly distributed to prevent localized stress and false failure indications. This uniform load distribution is achieved using unbonded caps.
Correct application of these caps leads to higher compressive strength results, indicating a more accurate reflection of the concrete’s quality. Regular maintenance and adherence to ASTM C 1231 guidelines for replacement are critical to prevent inaccuracies in test results caused by worn or damaged unbonded caps.
Interpreting Test Results
The raw data from the compressive strength testing can be overwhelming. However, with the right knowledge, interpreting these results can be quite straightforward. According to ACI 318-19, the arithmetic average of any three consecutive strength tests must equal or exceed the specified strength, and no single test should fall below the specified strength by more than the allowed margin.
To provide a reliable representation, evaluators assess a concrete batch by averaging the results of at least two cylinders. They determine the average compressive strength by dividing the failure load by the cross-sectional area. Evaluators measure the cylinder strength results against the specified strength of concrete (f’c), using it as a benchmark to determine whether concrete mixtures meet the job specifications.
Handling and Reporting Data
Following testing, data handling and reporting take precedence. During this phase, the technician records detailed observations, such as:
- The date of receipt and testing in the lab
- Specimen identification
- Cylinder diameter
- Test age
- Maximum load applied
- Compressive strength
- Type of fracture
- Any defects or anomalies in the cylinders or caps
These reports are crucial documents that should be expeditiously forwarded to the concrete producer, contractor, and owner’s representative.
Routine analysis of concrete strength results includes:
- Correlations with factors such as slump or air temperature
- Acting as an early warning system
- Ensuring quality control and production consistency over time.
Summary
In conclusion, the size of cylinder for concrete testing is a precise and meticulous process that plays a critical role in the construction industry. Starting from selecting the right cylinder size, preparing and molding test cylinders, carrying out the initial and final curing processes, to compressive strength testing and analysis, each step is guided by established standards and project specifications. The handling and reporting of data provide valuable insights for quality control, paving the way for safe and durable concrete structures. Remember, the strength of the concrete is in the details!
Certified MTP has the largest selection of concrete testing supplies, showcasing industry-leading brands for Slump Cones, Tamping Rods, Concrete Air Entrainment Meters, slump testers, Concrete Test Cylinder Molds, and fresh concrete testing equipment. We also offer the largest selection of tamping rods for concrete tests.
Frequently Asked Questions
What size cylinder is used for the compression test?
A cylinder size of 4x8in or 6x12in (100x200mm or 150x300mm) in diameter by length is used for compression testing. This allows for testing a range of compressive strengths.
What size are concrete sample tests?
Concrete sample tests are typically 6-inch-diameter by 12-inch-tall plastic molds, although 4-inch-diameter by 8-inch-high cylinders are also used in some projects.
What is the ASTM standard for testing concrete cylinders?
The ASTM standard for testing concrete cylinders is ASTM C39. It has been the industry standard for testing the compressive strength of cylindrical concrete specimens for over 80 years.
Does cylinder size affect the compressive strength of concrete?
The size of the cylinder may have a greater impact on compressive strength for small-scale models, where standard cubes generally exhibit higher strength than standard cylinders with a height/diameter ratio of 2.0. However, for normal-strength concrete, different cylinder sizes do not result in differences in compressive strength tests at various time intervals.
Why is it important to choose the right cylinder size for concrete testing?
Choosing the right cylinder size standard test method for concrete testing is important because it ensures that the sample is representative of the concrete’s in-place strength, especially for compressive strength testing. This is crucial for obtaining accurate results (2023).
Related Blogs for Size of Cylinder for Concrete Testing:
Ultimate Strength Epoxy Gel: The Reliable Adhesive Solution
Top Deck Epoxy Sealer for Durable Wood Finish
Correctly Measure Cracks and Fissures with a Concrete Testing Product
What is Non-Destructive Testing of Concrete?
Ultrasonic Pulse Velocity Test | Concrete Non-Destructive
Understanding Non-Destructive Test: Methods & Applications
Crack Measurement in Concrete: A Guide to Accurate Results
Protection with Waterproof Epoxy Glue: Your Bonding Solution
Steel Concrete Molds: Your Guide for Endurance and Precision
Exploring the Poly Mold for Cement and Mortar Testing
Concrete Cylinder Molds for Testing and Construction
Concrete Cylinder Molds: All You Need to Know
Guide to Grout Molds for Cement, Mortar & Compression Tests
Tampering Rod for Concrete Slump and Cylinder Mold Tests
Cement Casting Molds: Everything You Need to Know
How to Use a Catalog of Concrete Molds
How To Use A Concrete Mold: Do’s and Don’ts
Concrete Cylinder Mold Options for Reliable Testing


