


Discover the sieve test, the standard method for particle size analysis in materials. Designed for professionals seeking to understand material characteristics, this technique sorts particles using varying mesh sizes. This article introduces the sieve mesh test, illustrates its importance across industries, and briefly outlines the testing process, preparing you for the in-depth content that follows.
Key Takeaways
- Sieve testing, or sieve analysis, is a method for determining the particle size distribution of granular materials, crucial for assessing their flowability, surface area, density, and mechanical properties.
- The sieve test procedure involves sample preparation, sieving process, and result analysis, with steps including thorough sample mixing, arranging sieves by size, shaking the stack, and weighing materials retained on each sieve for distribution analysis.
- Sieve analysis faces challenges such as accuracy with fine particles and is influenced by particle shape and powder cohesiveness, but these can be mitigated by employing automated and digital analysis tools.
The Fundamentals of Using a Sieve for Testing
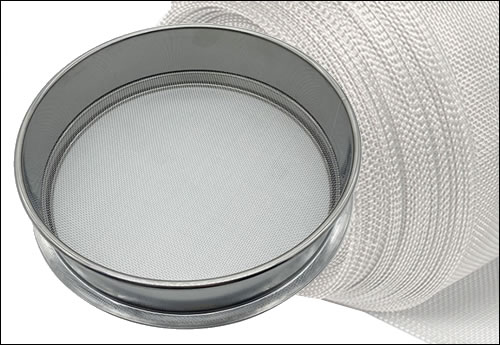

At its core, sieve testing, also known as traditional sieve analysis, is a method used to assess the particle size distribution of granular materials. Imagine pouring a mixture of different sized pebbles through a series of sieves. Each sieve’s mesh is smaller than the one above it, resulting in the separation of the pebbles into different size groups. This is essentially how sieve analysis works, with the sieves being an integral part of the process.
Particle size distribution, particle size fractions, and particle size analysis can significantly impact a material’s properties, including:
- Flowability
- Surface area
- Density
- Mechanical properties
Therefore, understanding these distributions is key in many industries, from construction to pharmaceuticals, where the performance of a material can make or break a project.
Using the Sieve To Test: Step-by-Step Procedure

Accurate interpretation of sieve test results and sieve analyses requires a thorough understanding of its procedure. The test involves three key steps: sample preparation, the sieving process, and result analysis. Let’s delve into each of these steps.
Sample Preparation for Sieve Testing
The first step in a sieve test is to obtain a representative sample of the material you are testing. This might involve stockpile sampling with a shovel or a sand probe, following standard sampling methods to ensure consistency. Once you have your sample, you need to mix it thoroughly, turning it over three times with a shovel to ensure a homogeneous mixture.
Next, you might need to reduce the size of your soil sample, especially if you’re dealing with fine and coarse aggregates. Techniques such as:
- dry sieving
- crushing
- mixing
- quartering
can help reduce the size of your sample. Finally, the total mass of the sample is determined by measuring the known weight of the sample and pouring it into the sieve with the largest sieve size.
Conducting the Sieving Process

With your sample prepared, you can now commence the sieving process using woven wire mesh sieves. This sieving chamber involves:
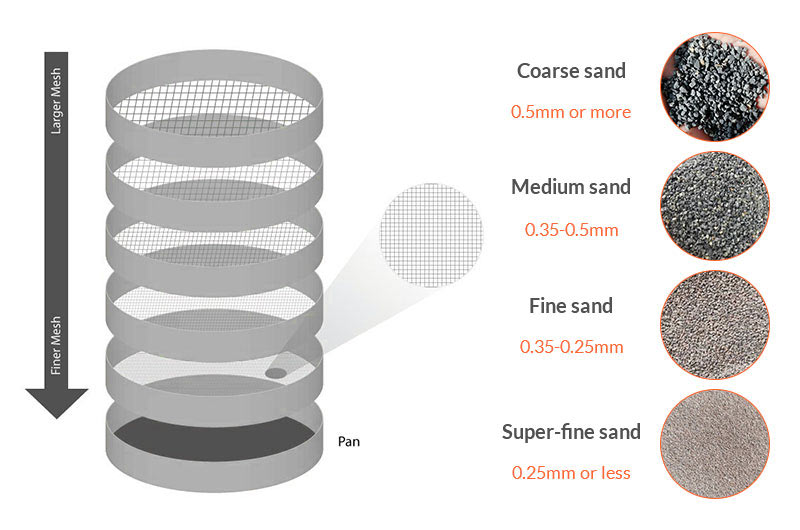
- Arranging the sieves in ascending order of mesh size, with the largest sieve at the top and the smallest at the bottom.
- Placing the sample on the top sieve.
- Agitating the sieve stack, either manually or using a sieve shaker. The aim is to expose the sample to all the apertures in a sieve, ensuring smaller particles pass through while larger ones are retained.
The sieving process duration varies with the various sample size and precision level. However, it is imperative to ensure thorough particle separation. This might involve shaking the stack for an additional minute after the initial sieving process.
Analyzing Test Results
Result analysis marks the concluding step of the sieve test. After the sieving process, the material retained on each sieve is weighed, and the percentage of the total mass that each sieve represents is calculated. This gives you the cumulative percentage sample mass of particles passing and retained on each sieve, providing a comprehensive overview of the particle size distribution.
These results can be represented on a semi-logarithmic plot, which allows for a visual representation of the particle size distribution. There are also a number of software options available that can aid in the visualization and analysis of sieve test results, such as:
- GS5
- TransCalc
- WinSieve
- SieveGraph
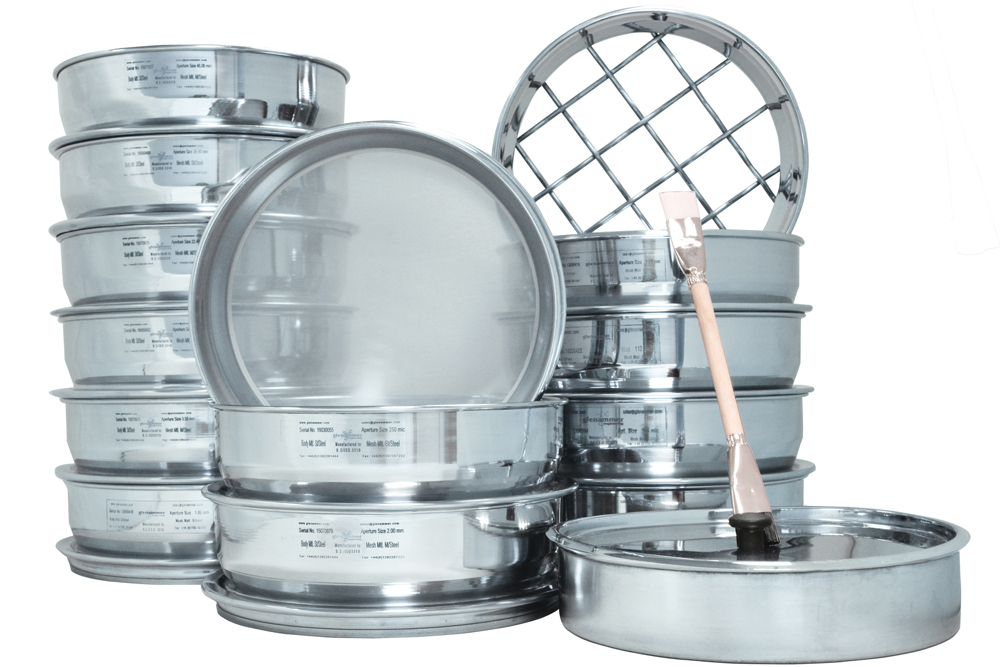
Selecting the Right Sieves for Your Material
Choosing appropriate test sieves for your material is a critical aspect of sieve testing. It’s not a one-size-fits-all approach. Instead, you need to consider several factors, including:
- The type of material
- The alloy of the sieve
- The suitable mesh size
- The size of the sieve itself
The required particle size range will directly affect the sieve sizes you need to use. The sieve sizes determine the necessary opening sizes that will allow particles to pass through or be retained for accurate particle size distributions and distribution analysis. Furthermore, ASTM and ISO standards provide precise specifications for selecting sieves based on the specific characteristics of materials and intended applications, ensuring conformity with established industry norms.
Sieve Shakers and Their Role in Sieve Testing


Sieve shakers, crucial in sieve testing, offer consistent and reproducible shaking or tapping motions. This practice exposes the sample to all sieve openings and apertures, expediting the passage of smaller particles.
We’ll explore two types of sieve shakers – horizontal sieve shakers along with those employed for wet sieving and air jet sieving.
Horizontal Sieve Shakers
Horizontal sieve shakers, utilizing horizontal sieving techniques, provide a horizontal, circular motion that helps to separate fine and coarse-grained products. These tap sieving shakers are particularly suited to analyzing needle-shaped, flat, long, fibrous, or disk-shaped samples.
Some models of horizontal sieve shakers can handle full-height sieves of 12 inches or 300mm, accommodating larger sample amounts. Using a horizontal sieve shaker can lead to enhanced consistency, precision, and reproducibility in separations, making them a valuable tool in sieve testing.
Wet Sieving and Air Jet Sieving
For materials that tend to agglomerate or are difficult to separate using vibrational sieving techniques, wet sieving or air jet sieving may be employed. Wet sieving involves using water to separate granular materials that tend to clump together, while air jet sieving utilizes an air jet to disperse and draw particles through sieve apertures.
Wet sieving is ideal for analyzing clay bodies and materials with a high concentration of fine particles that are difficult to separate through dry sieving. On the other hand, air jet sieving is highly effective in obtaining precise particle size distribution for samples that have a tendency to agglomerate, particularly for fine particles within the range of 10 microns to 4 millimeters.
Challenges and Limitations of Sieve Testing
As with any technique, sieve testing presents certain limitations. These include the assumption of particle shape, challenges with cohesive fine powders together, and accuracy issues with fine particles. The accuracy of sieve testing results diminishes as particles become finer. Thus, it is recommended to employ larger mesh sizes, such as woven wire mesh, when dealing with finer particles to minimize potential damage to the finer mesh.
These challenges can be mitigated through the application of automation and digitalization. Automation, particularly image analysis, can deliver precise and reliable sieve results more efficiently than manual methods. Furthermore, digitalization has facilitated the automation of grain size distribution workflows in sieve analysis, improving the testing process.
Enhancing Quality Control with Sieve Analysis


Within engineering and material science realms, sieve analysis emerges as a quintessential tool for quality control. By determining the particle size distribution of a material, sieve analysis allows engineers to evaluate the uniformity and quality of materials, ensuring their compliance with the rigorous standards of various applications.
Moreover, understanding these distributions enables the management of material properties. By separating materials according to size, eliminating undesirable elements, and maintaining consistent quality of the aggregate, sieve analysis can help to achieve optimal performance. Given these factors, the significant role of sieve analysis in assuring product quality in industrial applications is unsurprising.
Summary
In conclusion, sieve testing is a powerful, versatile tool in material science and engineering. From understanding the fundamentals of sieve testing to exploring the role of sieve shakers, we’ve journeyed through the various stages of sieve testing. Despite its challenges and limitations, sieve testing remains a vital technique for enhancing quality control and identifying material properties for optimal performance. By leveraging automation and digitalization, we can further improve the precision and efficiency of sieve testing.
Certified MTP has the largest selection of aggregate testing supplies, showcasing industry-leading brands for Sieve Shaker Machines, test sieves, Classification Devices for Aggregate Testing, Sample Splitters and Dividers, and Specific Gravity Test Equipment.
Frequently Asked Questions
How do you test a sieve?
To test a sieve, run powder samples on the complete sieve surface and calculate the residue, then compare the values with other sieves to select “matched” sieves. However, this procedure has some shortcomings.
What is the purpose of sieve?
The purpose of a sieve is to separate materials based on particle size and control the particle size distribution of a sample. It is widely used in industries such as chemical, food, medicine, mining, and building materials to ensure quality and uniformity in both granular material and powder materials.
How do you interpret a sieve analysis?
A sieve analysis can be interpreted by analyzing the retention of particles through a sieve stack or the material that passes through each sieve. You can also analyze the cumulative material retained or passed through standard sieve stack to understand the distribution of particle sizes.
How long does a sieve test take?
A sieve test typically takes an initial time of 3-5 minutes, with additional increments of 1-5 minutes for subsequent tests. The overall duration may vary depending on the specific requirements.
How is the sieving process conducted?
The sieving process is conducted by arranging sample material in the sieves in ascending order of mesh size, agitating the sample, and calculating the percentage of the total mass that each sieve represents. This ensures accurate particle size analysis.
View the full line of Aggregate Testing Products and Aggregate Moisture Testing Equipment, especially the popular Aggregate/Sand Moisture Measurement System
Related Blogs for Sieve Test
Sieve Brushes for Efficient Cleaning and Maintenance
Top Scrub Brush for Concrete: Your Ultimate Cleaning Tool
Quality Lab Brushes for Efficient Cleaning and Maintenance
Retsch AS200 Sieve Shaker: Mastering Particle Size Analysis
ASTM C136: Guide to Fine and Coarse Aggregate Sieve Analysis
Sand Sieve Size: A Guide for Optimal Sifting
Sieves for Soil: Finding the Perfect Match for Gardening
Sieve Analysis of Soil: A Guide to Particle Size Assessment
Understanding Aggregate Sieve Sizes: A Comprehensive Guide
ASTM Sieve Sizes: A Complete Sizing Chart Breakdown
Graph for Sieve Analysis: A Guide to Accurate Soil Grading
Top-Quality Sieves for Precise Material Separation
Sieve Mesh Sizes: Guide to Understanding Different Mesh
Sieve Shaker Selection: Find the Model for Material Analysis
The Ultimate Sieve for Compost Mastery: Simplify Your Soil
Sieve Shaker for Sale: Find the Perfect Fit for Your Lab
Sifting with Gilson Sieves: Your Guide to Material Analysis
Gilson Sieve Shaker: Particle Size Analysis
Sieve Size Chart: Understanding Mesh and Particle Sizes
Sieve Essentials: Understanding Its Functions & Applications
Top Standard Test Sieves for Accurate Material Analysis
Using Retsch Lab Sieves and Sieve Shakers for Analysis
What is a Shaker Sieve and Particle Sizing Analysis
Understanding ASTM D 422: Sieve Analysis and Particle Size
Sizes of Sieves: A Comprehensive Guide
Sieve Analysis: A Guide to Grain Size Distribution
Understanding Sieves: A Comprehensive Guide to Test Sieves
Selecting Sieve Sizes: Tips for Soil, Sand & Aggregate
Complete Guide to US Sieve Sizes
Gilson Company Testing Equipment: Discover Durability
Gilson Shakers: Precision Screeners & Shaker Screens
Exploring What is Sieving Used For: Applications & Technique


